
The “–amend” option lets you amend the last commit by adding a new file (or multiple files). Using the “–amend” option, you can also overwrite the message of your last commit.
#6 git log
If you want to see a listing of commits on a master branch including details with logs then type the following command in your terminal:
git log

If you use “git log” command then it shows commits of all authors. To view commits of particular author use following command in your terminal:
git log –author=name_of_the_author

You can also view the abbreviated version of you log by typing the following command:
git log –oneline

But if you want to see list of version history for a file, including the renaming of a file then type the following command in your terminal:
git log –follow ‘file_name’

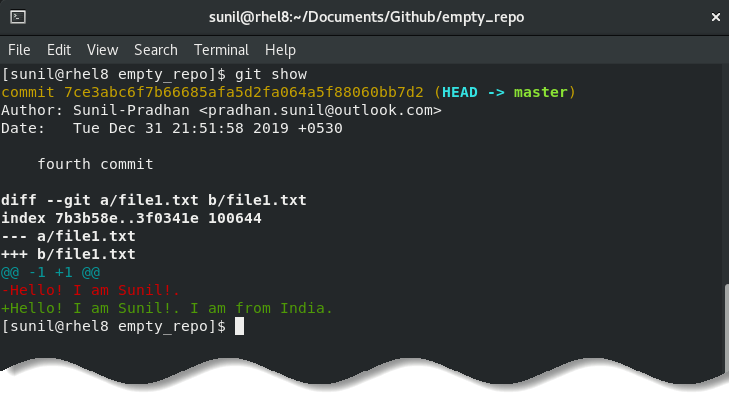
#7 git show
This command shows the metadata and content changes of the specified commit.
Type in your terminal:
git show
#7 git push & git pull
In real development, your workflow will look like this:
- You work on a feature and commit files to a branch (master or any other branch)
- You push commits to a remote repository
- Other developers pull your commits to their computers to have the latest version of the project
Git has a “remote” command to deal with remote repositories. But before we jump into an explanation of how the “remote” command works, you have to do a little bit of setup.
First things first, you need to create a remote repository. We are using GitHub for this section. You can create an account on GitHub and create a new repository for your project. Just start a project and give it a name.

You then need to grab the HTTPS link to this new repository.

Now you need to bind this remote repository to your local repository by using following command:
git remote add origin ‘HTTPS URL’

The command demonstrated as you tell Git to “add” a repository. The “origin” option is the default name for the server on which your remote repository is located. Lastly, there’s a link to your project on GitHub.
Note: The “remote” command is used to connect your local repository to the remote server.
Once you run the command above, Git will connect your local and remote repositories. But what does this actually mean? Can you already access your code online? Unfortunately, not yet.
Actually with Git, copying your code to a remote repository looks like this:
git push -u origin master

It’s obvious that the command “push” tells Git to push your files to a remote repository. What we also specified is the server our local repo is connected to (origin) and the branch your pushing, which is master.
There is also that strange “-u” option. What it means is that we are lazy enough not to run a long “git push -u origin master” command each time you push code to the cloud. Thanks to “-u”, you can run only “git push” next time!”
Is this the happy ending? Not yet. Once you push code to a remote repository, you have to enter your username and password registered with that remote repository.
The current problem with “git push” is that you have to enter your credentials each time you push code to GitHub. That’s not convenient. The root of this problem is the HTTPS link you used to connect repositories. Git offers a way out of this inconvenience, however.
Let’s get back to the page where GitHub offered a link to your project:

As you can see, there is an SSH option that we can use instead of HTTPS. If you set up Git on your computer to work with SSH, then you won’t have to enter GitHub credentials every time you push code to GitHub.
You will only need to add a remote origin with this SSH link, like this:
git remote add origin <SSH_link>
As you can see, to connect repositories via SSH you only need to change the link. Keep in mind that HTTPS is the default protocol used for connecting with GitHub, and you need to manually set up SSH.
Now that you have added a remote repository, you can view the list of repositories by running the following command:
git remote -v

The “-v” option will list all remote repositories you have connected to.
So far, you have pushed your changes from a local repository to a remote repository. But what about “pull” command, though. Pushing changes to GitHub is great.
But when other developers push their changes to a remote repository, you will want to see their changes on your computer. That is, you will want to pull their code to your local repository.
To do so, run the following command:
git pull

But wait! the “git clone” and “git pull” command almost does the same task then what does the difference between them?
Cloning a repository is very different from pulling from a repository. If you clone a remote repository, Git will:
- Download the entire project into a specified directory; and
- Create a remote repository called origin and point it to the URL you pass
The last item simply means that you don’t need to run “git remote add origin git@github.com:YourUsername/your-app.git” after cloning a repository. The “clone” command will add a remote origin automatically, and you can simply run “git push” from the repository.


Add comment