
Here are steps which you need to follow to get started with MySQL from Windows command prompt:
Step 1: Type “System” in the search box on Windows taskbar, and select the result.

Step 2: Click on “Advanced system settings.”

Step 3: Select “Advanced” then click on “Environment Variables.”

Step 4: Select “Path” and click on “Edit” button.
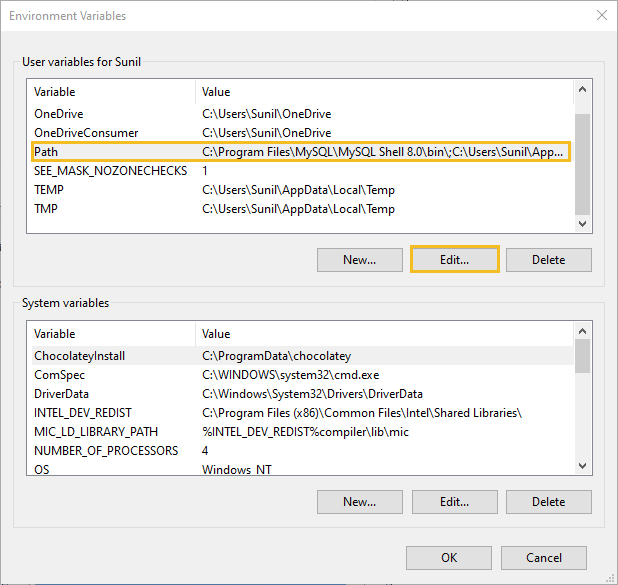
Step 5: Click on “New” button and add “C:\Program Files\MySQL\MySQL Server 8.0\bin” (the exact may differ depending upon version and architecture of the application) to the list. Click “OK” button.

Click two times more “OK” button to save the settings.
Step 6: Open run command by using keyboard shortcut “CTRL + R” and type “CMD” and click on “OK” button.

Step 7: Type “mysql –user=root –password=[enter_your_password]” and hit enter.

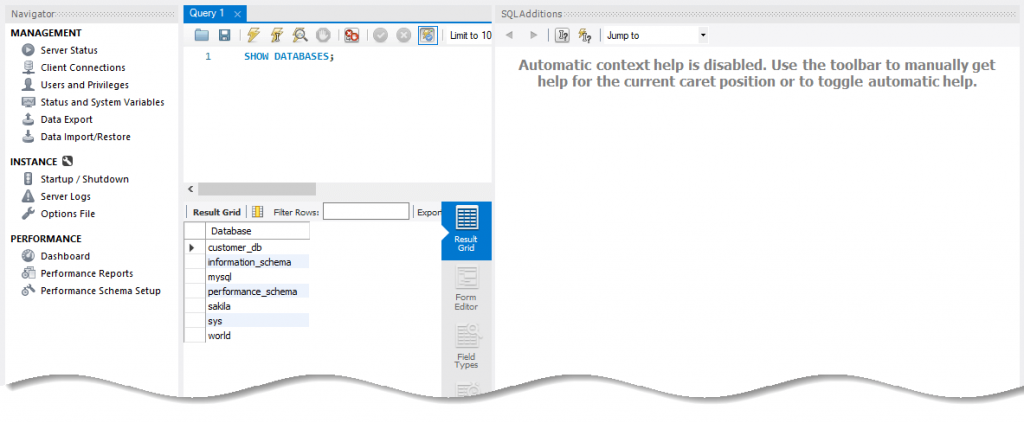
Step 8: Now you can start working with MySQL from Windows command prompt, to show all databases available currently on MySQL server type the following command:
SHOW DATABASES;

MySQL Workbench
Sometimes working with MySQL through command line is cryptic, It creates typo error and real development not possible with command line interface. MySQL Workbench is best alternative solution for command line.
Here are steps which you need to follow to get started with MySQL Workbench:
Step 1: Type “MySQL Workbench” in the search box on Windows taskbar, and select the result.

Step 2: Click on “root” user from the welcome screen.

Step 3: Enter root user password.

Step 4: Now you can start working with MySQL Workbench, to show all databases available currently on MySQL server type the following command:
SHOW DATABASES;
Conclusion
This article is pretty short, but more focus towards create MySQL development environment on Windows 11 operating system. By completing this tutorial, you have learned how to install MySQL on Windows 11 platform using MySQL installer.
We have also introduced you few command line tool built into MySQL and how to login into that system. Thanks for reading this article and if you have any questions or comments, then leave them below.


Add comment