

Check the Create a virtual hard disk now option so we can later define Ubuntu OS virtual hard disk size.
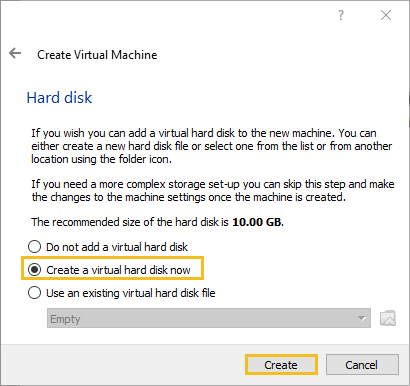
Click Next.
Step 7: Now, you need to select VDI (VirtualBox Disk Image).

Click Next.
Step 8: Next, we will dynamically allocate storage on our physical hard disk.
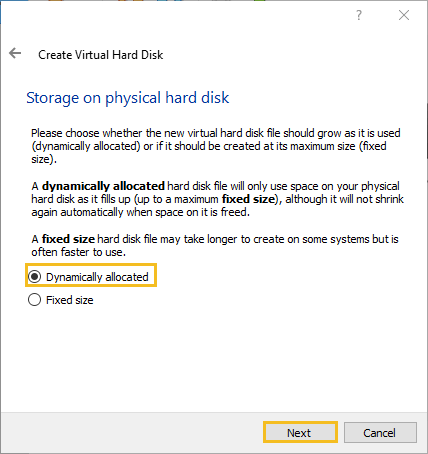
This option allows you to save space on your physical disk until the virtual disk grows to its maximum allocated size.
Click Next.
Step 9: Here we need to specify Ubuntu OS’s size. The recommended size is 10 GB, but you can increase the size if you wish. We have increased it to 30 GB.
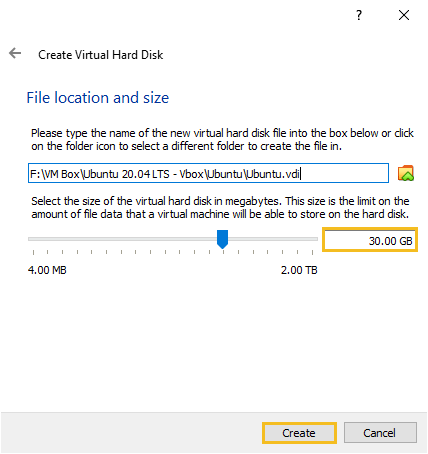
Hit Create to finish creating a new virtual machine to install Ubuntu on VirtualBox.
Step 10: After creating a virtual hard disk, you will see Ubuntu in your dashboard.
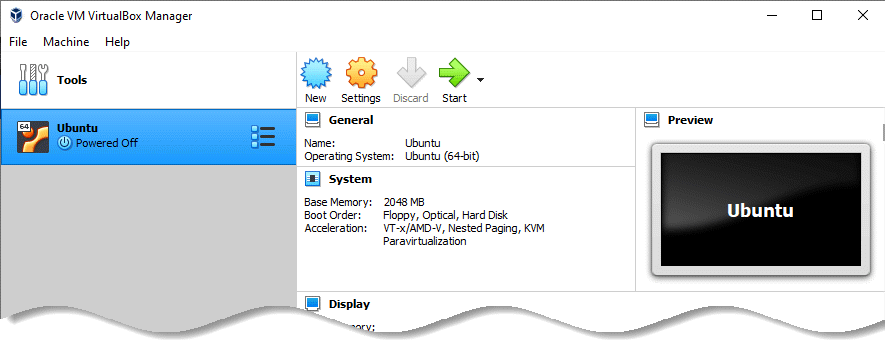
Now, we have to set up the Ubuntu disk image file (.iso).
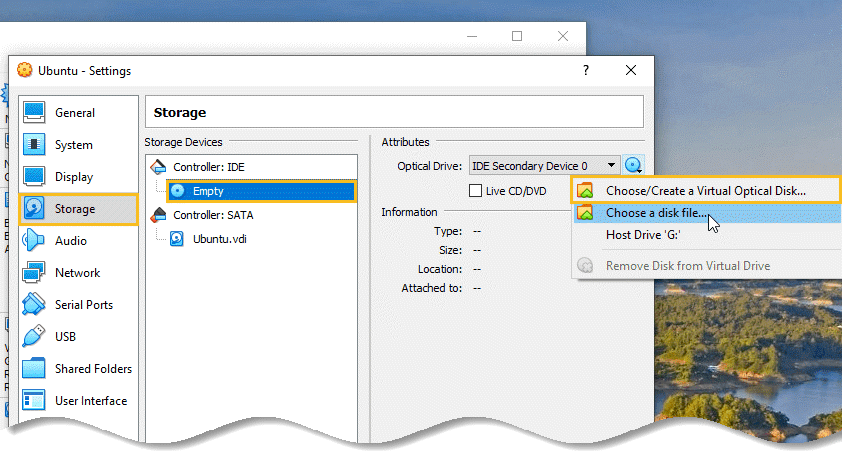
Step 11: After creating a virtual hard disk, you will see Ubuntu in your dashboard. To set up the Ubuntu disk image file, go to settings and follow these steps:
- Click Storage
- In storage devices, click Empty
- In attributes, click the disk image and Choose/Create a Virtual Optical Disk…
- Select the Ubuntu disk image file and open it
Step 12: Few other settings which you can adjusts are as follows:

