
With Git, this basket is the staging area. When you move files to the staging area in Git, you actually gather and prepare files for Git before committing them to the local repository.
Click on the “+” button that appears on hover next to each file to stage them.

After you click on the files you want to stage, Visual Studio Code (VS Code) moves those files from the “Changes” directory to the “Staged Changes” directory, that means they are now in the staging area.
If you want to stage all your files at once, then click on three dots (…) then select the option “Stage all changes”. Which will put all your files straight to staging area.


How to commit your changes in Visual Studio Code (VS Code)
Staged changes are not yet recorded, you also need to commit them, so that later you can have a look at or move back to the current state of your repository. In order to commit the staged changes, you need to add a commit message that describes the changes you made.
In order to make a commit, let’s type “1st commit” into the input bar at the top of the side bar, and click on the little tick (✓) icon. Now you are ready with your first commit, the initial state of your repository is recorded.

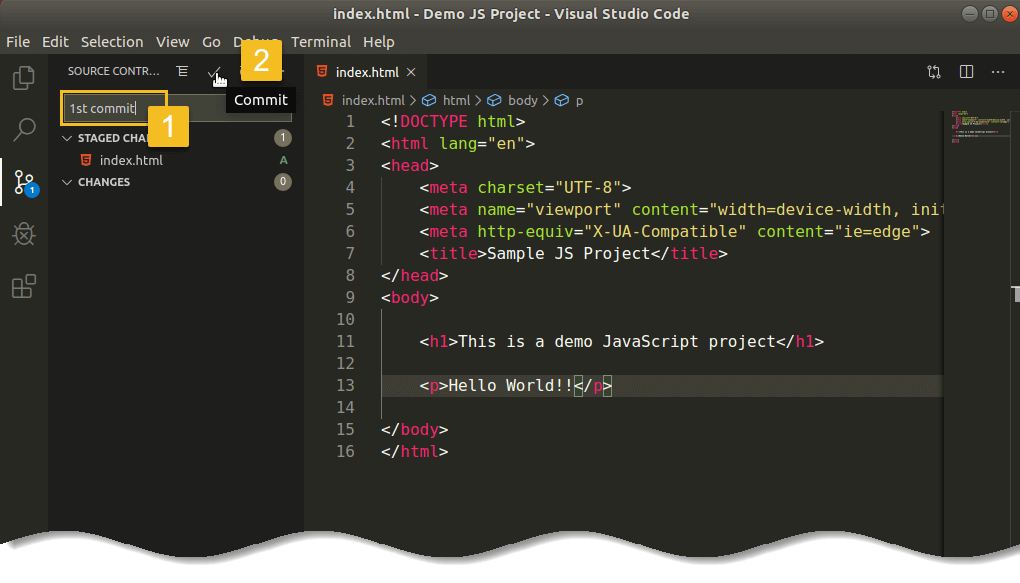
Your Git working directory is clean, all the changes you made so far are tracked, and your source control view says there are 0 changes (it always compares to your last commit). If you make new changes in your workspace, the new changes will appear again in the side bar, and you will need to commit them again once they reached the amount that’s worth committing.
On the screenshot below you can see how Visual Studio Code (VS Code) looks like right after committing.


How to push your local changes to remote repository in Visual Studio Code (VS Code)
If you want to push your code to remote repository first of all, you need to create a repository on GitHub.
Let’s create a new repository on GitHub by following these steps:
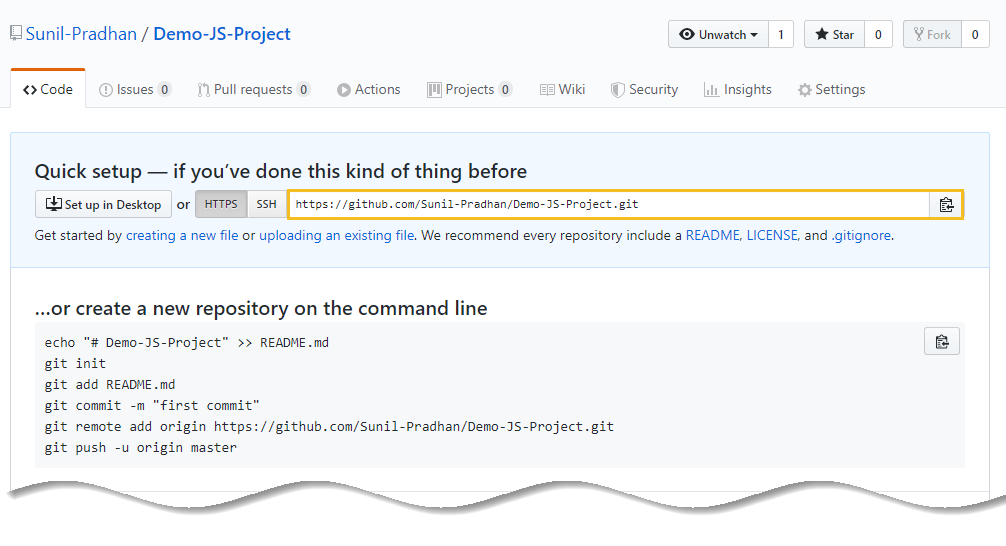
Step 1: To create a new repo on GitHub, log in and go to the GitHub home page. You should see a “+” button at the top right corner of the screen near your user photo.Click the “+” button and then click the “New repository”


Step 2: Give your repository a name and a description. Then you can choose to make your repository either “Public” or “Private”. When you are done filling out the information, press the “Create repository” button to make your new repository.


Step 3: You have successfully created a repository on GitHub. Now copy URL of the repository as illustrated.

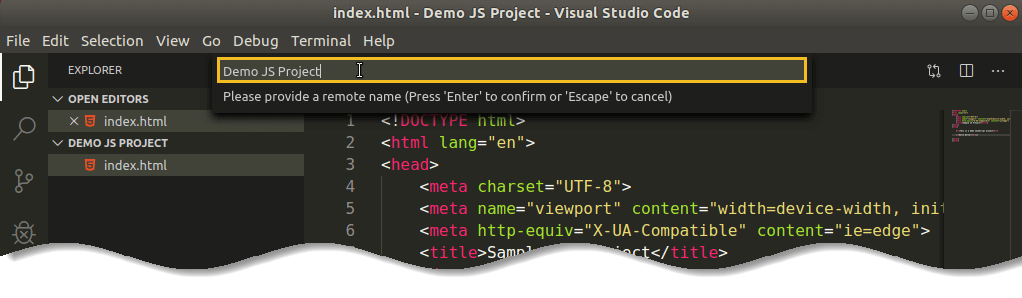
Step 4: Go straight to Visual Studio Code (VS Code) then “View” –> “Command Palette…”


Step 5: Select the option “Git: Add Remote”.


Step 6: Enter the remote name such as “Demo JS Project”.

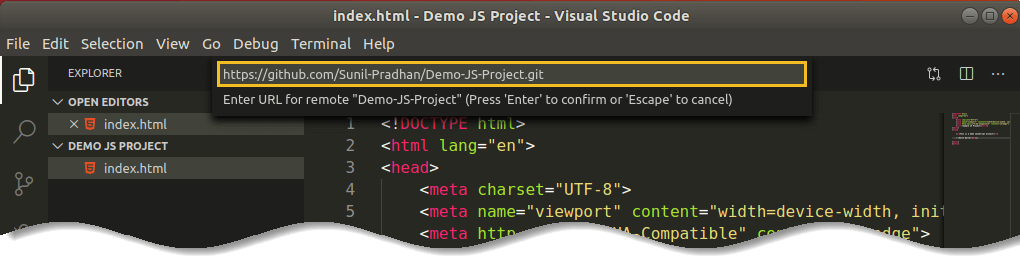
Step 7: Then enter GitHub repository URL which you had copied in the step 3.

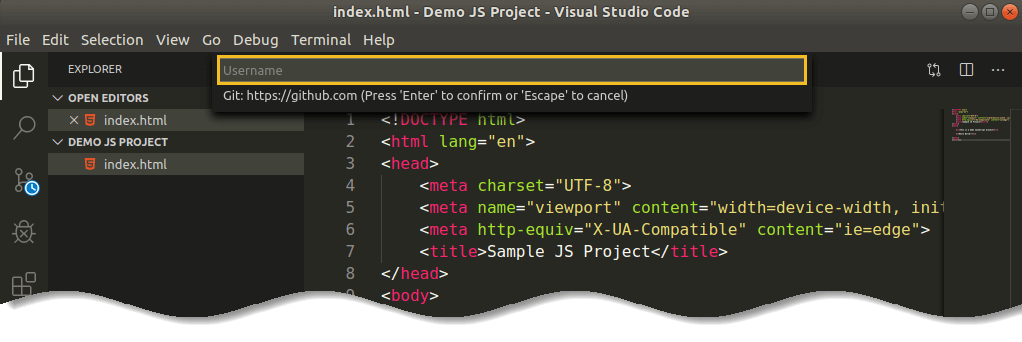
Step 8: Click on the “Publish changes” icon and it will ask you to enter your GitHub username.

Step 9: Enter your GitHub username and press enter.

Step 10: Enter your GitHub password and press enter.


Step 11: Open your browser and visit GitHub, where you can find your local repo is reflecting on GitHub in a shameless manner.


Now you have successfully push your local changes to remote repository.
How to compare changes in Visual Studio Code (VS Code)
Your file is now being tracked by Git as well as you have done your first commit. But what if, you are working in a team where other team members are also working on the same project. After you have done some changes to code base your other team members added few more line of code and then few existing line of code deleted by them.

