

A bootable USB flash drive is the best way to install or try Ubuntu. But Ubuntu only offer an ISO disc image file for download. You will need a third-party tool to turn that ISO file into a bootable USB flash drive.
With a bootable Ubuntu USB flash drive, you can:
- Install or upgrade Ubuntu
- Test out the Ubuntu desktop experience without touching your PC configuration
- Use tools installed by default on the USB flash drive to repair or fix a broken configuration
Many graphical tools abound that can help you create a bootable USB flash drive. One of the most widely used tools is Rufus, a simple yet very effective tool.
This tutorial will walk you through the process of creating a bootable Ubuntu USB flash drive on Windows 10 PC. You can use this USB flash drive to boot and test out or install Ubuntu on any computer that supports booting from USB.
What you need
- USB stick with 15 GB or larger space.
- A working system with Windows 10.
- Rufus a free and open-source USB stick writing tool.
- And Ubuntu ISO file.
Create a Bootable Ubuntu USB Flash Drive
Let’s get started and here are the steps to follow to create a bootable Ubuntu USB flash drive.
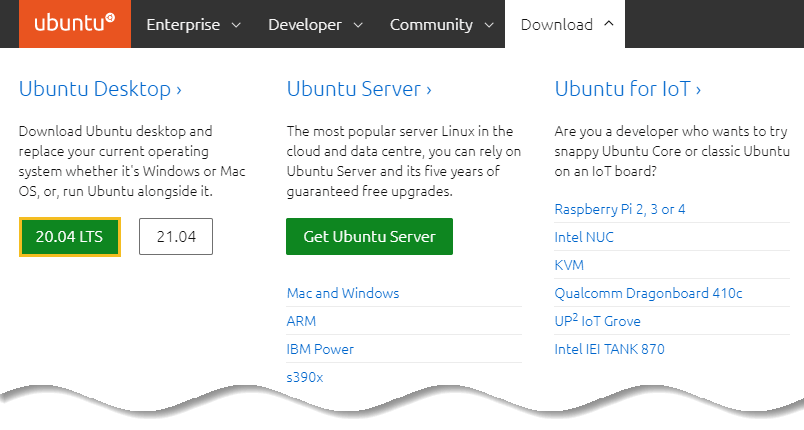
Step 1: To download the Ubuntu ISO file, visit the Ubuntu downloads page, where you can find download links for Ubuntu Desktop, Ubuntu Server, and various Ubuntu flavors.
Most likely, you will want to download the latest Ubuntu LST Desktop version.
Step 2: Once you have downloaded the ISO of Ubuntu, go to this page and download the latest version of Rufus.
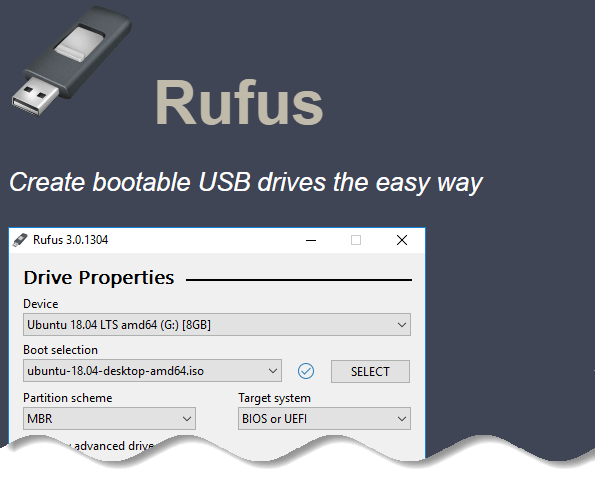
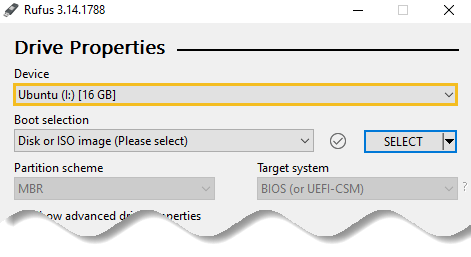
Step 3: Insert your USB flash drive and run the Rufus application. Rufus will update to set the device within the Device field.
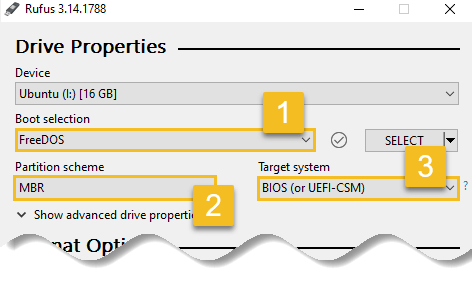
Step 4: Now choose the Boot selection. Choices will be Non bootable and FreeDOS. Since we are creating a bootable Ubuntu device select FreeDOS.
The default selections for Partition scheme (MBR) and Target system (BIOS (or UEFI-CSM)) are appropriate (and are the only options available).
Step 5: To select the Ubuntu ISO file you downloaded previously, click the SELECT to the right of Boot selection. If this is the only ISO file present in the Downloads folder you will only see one file listed.
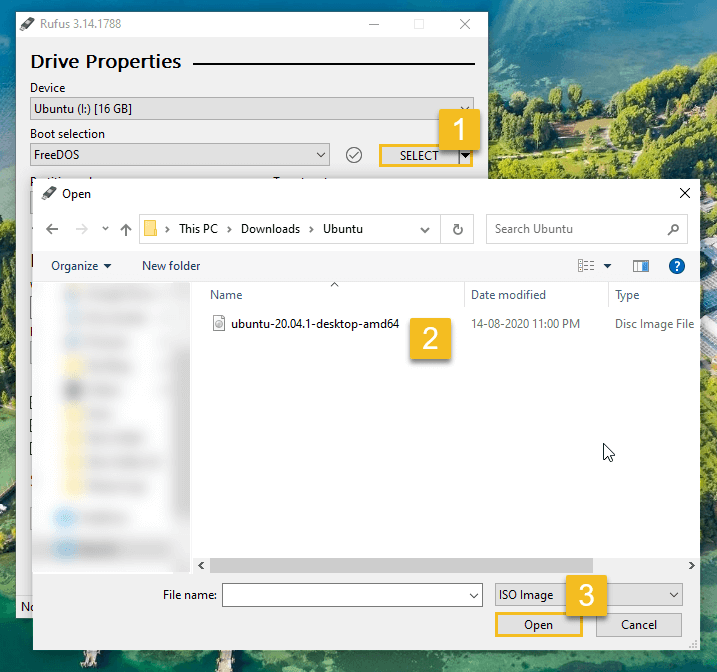
Select the appropriate ISO file and click on Open.
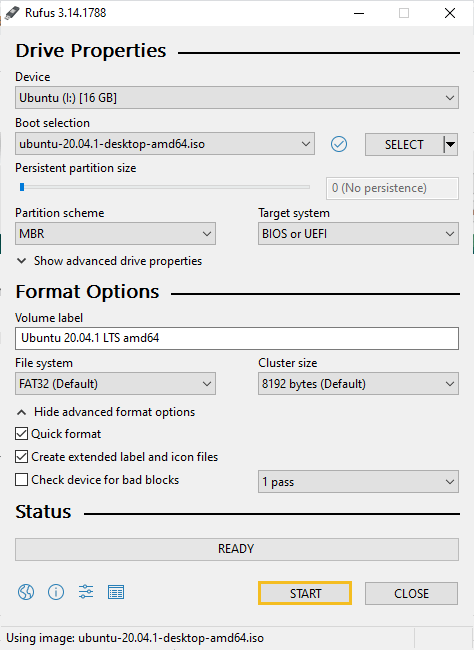
Step 6: The Volume label will be updated to reflect the ISO selected.
Leave all other parameters with their default values and click START to initiate the write process.
Step 7: You will be alerted that Rufus has detected that the Ubuntu ISO is an ISOHybrid image. This means the same image file can be used as the source for both a DVD and a USB flash drive without requiring conversion.
Keep Write in ISO Image mode selected and click on OK to continue.

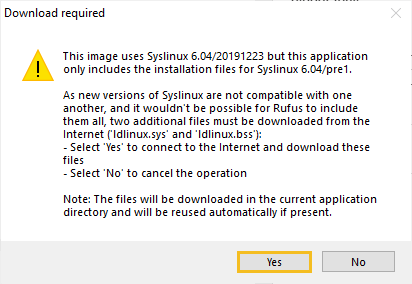
Step 8: You may be alerted that Rufus requires additional files to complete writing the ISO. If this dialog box appears, select Yes to continue.
Step 9: Rufus will also warn you that all data on your selected USB device is about to be destroyed.
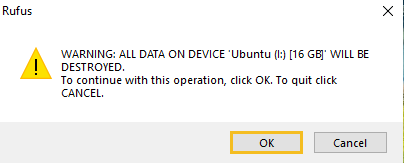
This is a good moment to double check you have selected the correct device before clicking OK when you are confident you have.
Step 10: The ISO will now be written to your USB flash drive, and the progress bar in Rufus will give you some indication of where you are in the process.
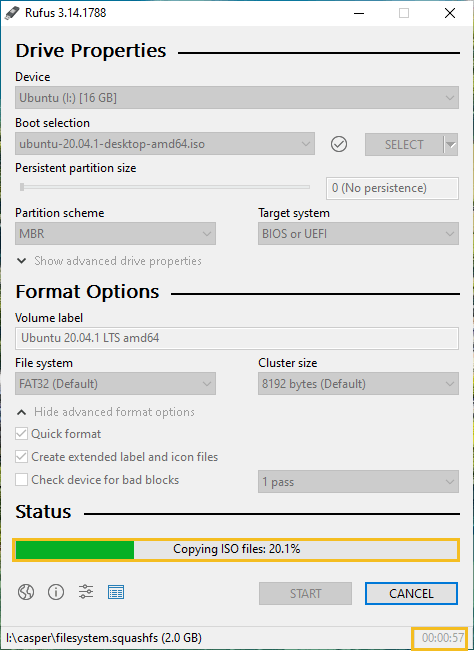
With a reasonably modern machine, this should take around 10 minutes. Total elapsed time is shown in the lower right corner of the Rufus window.
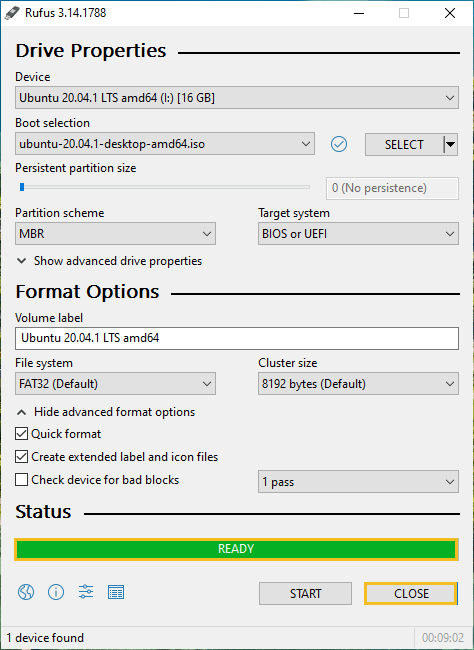
Step 11: When Rufus has finished writing the USB device, the status bar will be green filled and the word READY will appear in the center. Select CLOSE to complete the write process.
Congratulations! You now have Ubuntu on a USB flash drive, bootable and ready to go.
Conclusion
That’s all! You have a bootable Ubuntu on your USB flash drive.
We hope this tutorial helped you to easily create a bootable Ubuntu flash drive in Windows 10. If you hit a problem or have feedback, leave a comment below.

