

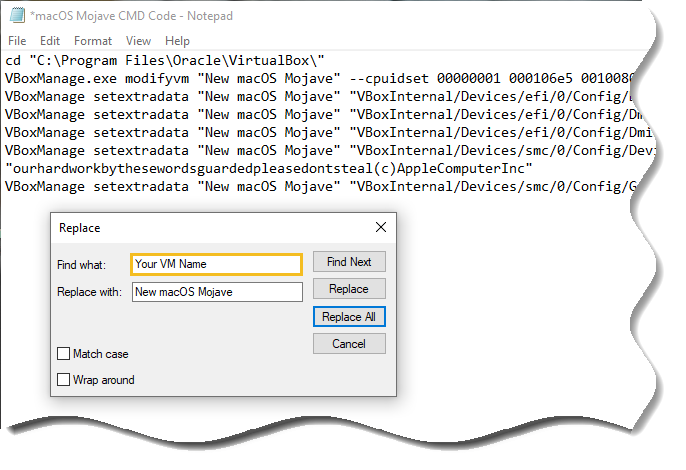
To make things a little easier, press Ctrl + H to open replace panel – write down “Your VM Name” on “Find What” and write down “New macOS Mojave” in “Replace with”.
At last, click “Replace All” to do your replaces at once. Just do like the screenshot below.

Step 2: + R and then type “cmd” and click “OK” to open up a regular Command Prompt.


Step 3: Copy and paste down the code on Command Prompt and press enter. It will take no more than a moment. Here you should not really get an error, just close when done. Here is a glimpse of what it looks like.


Install macOS Mojave on VirtualBox
Its time to install macOS Mojave on VirtualBox. Everything is configured and you are ready to install macOS Mojave operating system. Follow the steps below for installing macOS Mojave on VirtualBox.
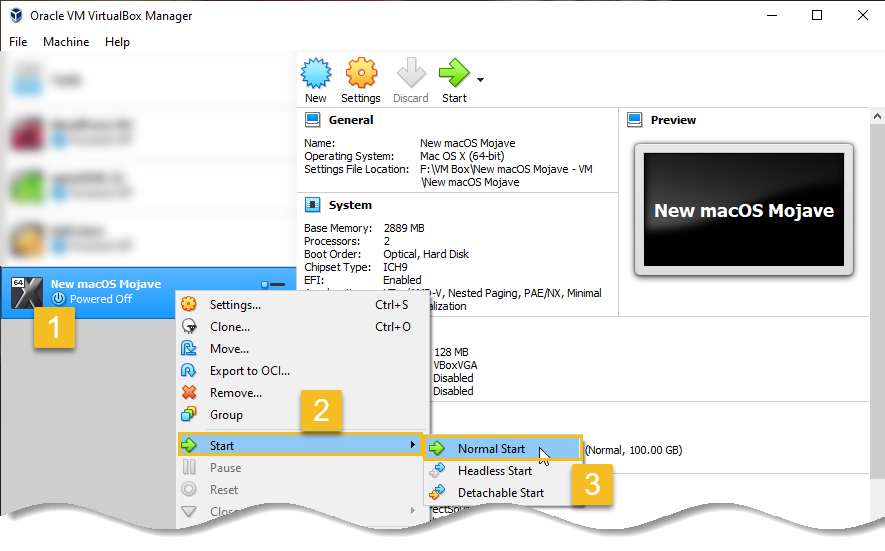
Step 1: Go ahead fire the Virtual machine and wait for the surprise boot. Sit back and grab a cup of coffee because it will take some time.

If you see a number of codes running on the screen, you do not need to worry about, it will just boot up, only wait.


Step 2: When booted, you will be greeted with “Welcome” page. Choose your location accurately and “Continue”.


Step 3: Choose a “Keyboard Layout” and click on “Continue”. If you did not see your preferred keyboard click on “Show All” text.


