

Now you have successfully created a new Virtual machine for RedHat (RHEL 8) Linux. But before starting your RedHat (RHEL 8) Linux Virtual machine we need to customize it’s preferences.
How to customize Virtual machine’s preferences for RedHat (RHEL 8) Linux
Well, if you want to work perfectly with RedHat (RHEL 8) Linux on VirtualBox, then you have to customize some settings. To edit them, open VirtualBox and then follow the below steps as mentioned.
Step 1: Select the created Virtual machine for RedHat (RHEL 8) Linux and then click on “Settings”.


Step 2: In the “General Tab”, select “Advanced”, change the option “Bidirectional” for shared chipboard and drag and drop.


Step 3: Go to the next option “System”. You will see three main categories.

Click on the first tab “Motherboard”. Uncheck “Floppy” drive and set the memory size 2 GB or more.
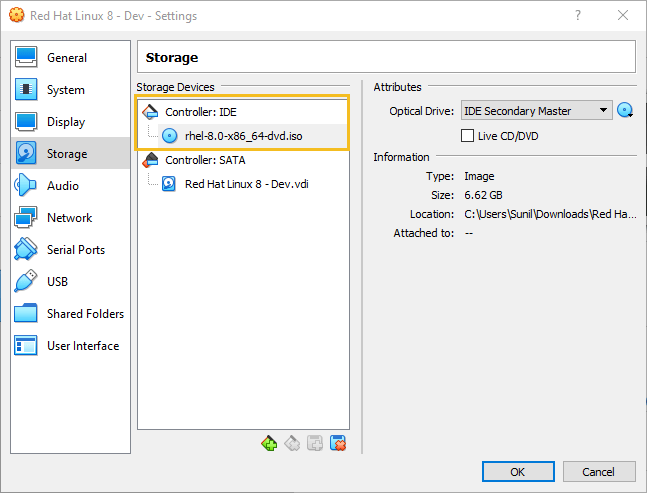
Step 4: Navigate to “Storage”. Click “Choose Virtual Optical Disk File…” then select RedHat Linux ISO file from your computer.


Now your RedHat Linux ISO file has attached successfully on virtual optical disk as mentioned below.
Step 5: Next navigate to “USB” section then “Enable USB Controller”. And choose “USB 3.0 (xHCI) Controller”.

Finally, to save all the changes, click, “OK” button.
Install Red Hat Enterprise Linux 8 (RHEL 8) on VirtualBox
Its time to install RedHat (RHEL 8) Linux on VirtualBox. Everything is configured and you are ready to install RedHat (RHEL 8) Linux operating system. Follow the steps below for installing RedHat (RHEL 8) Linux on VirtualBox.

