
Resizing a large number of photos isn’t tough to do. We will show you how easy it is to batch resize images in Adobe Photoshop.
In this article, we will show you how to batch resize images using Adobe Photoshop. Of course, you will need to have installed Photoshop to follow along with this tutorial. If you do not have it yet, you can get Photoshop from Adobe’s site here.
How to Batch Resizing Your Images
Batch editing is the technical term that describes working with a large group of photos. The process includes anything from color correction to cropping. But you can use it to do image resizing in Photoshop as well.
you will first need to collect your images into a folder for resizing. Remember to store this folder somewhere easily accessible with a path you can remember. Then, make sure that all the images have file types that work with Photoshop!
Now let’s take a closer look at the batch resizing process, starting with:
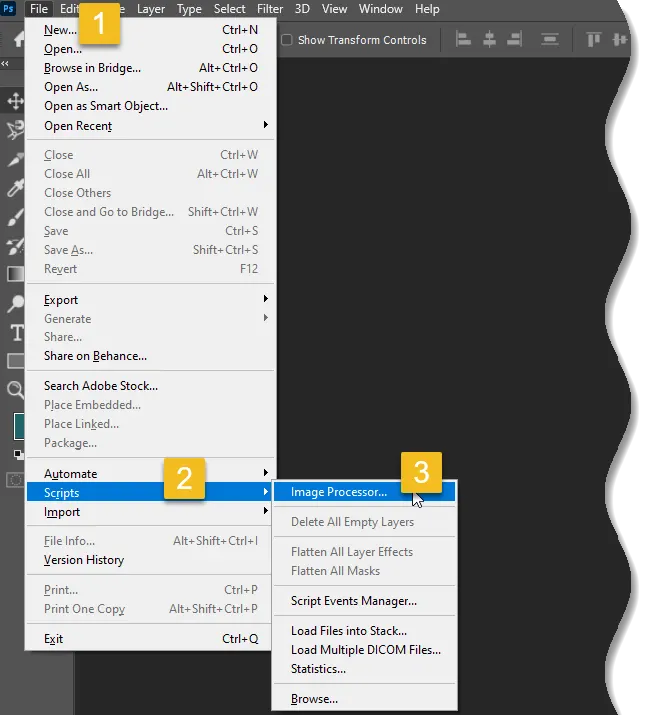
Step 1: Open the Image Processor
Choose File>Scripts>Image Processor.
Step 2: Select the Folder
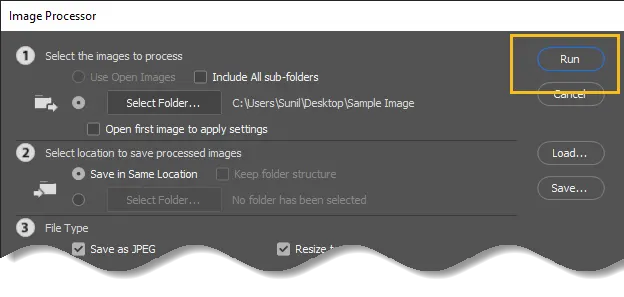
The image processor dialog box will open, where you will see a simple, four-step process for resizing your images:
In the first section of the image processor dialog box, you will need to identify the images you want to batch resize. You can choose to resize all open images by selecting Use Open Images.
Or you can pick a folder from your hard drive via the Select Folder button:
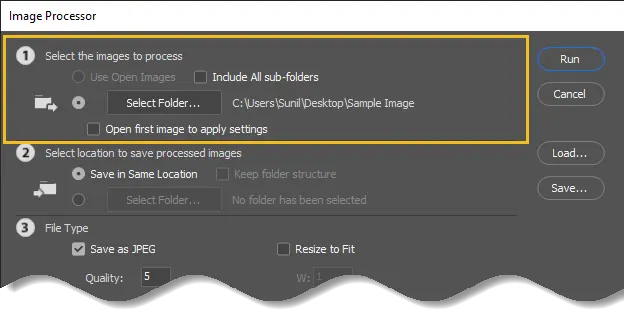
If you do select a folder, you can tell Photoshop to resize images in all subfolders as well; just hit the Include All sub-folders checkbox.
Step 3: Determine Your Export Location
Now it’s time to determine where you want your resized images to go.
To save the resized versions alongside the originals, simply select Save in Same Location:
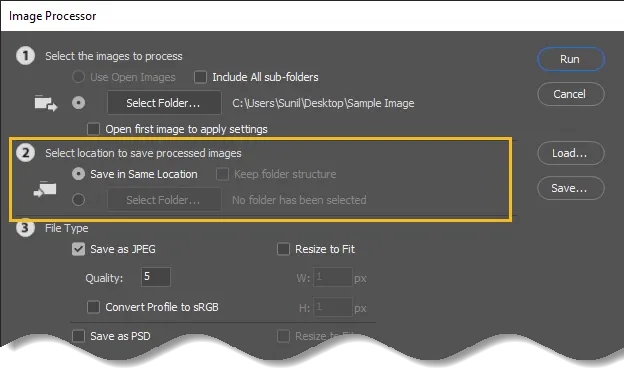
Then, when the resizing begins, Photoshop will create a subfolder next to the original files. (Because your resized versions will retain the names of the original files, creating a subfolder – rather than simply saving the images in the original folder – prevents any overwriting.)
Alternatively, you can select a different folder for the resized files too.
Step 4: Input Your Preferred Image Sizes
Determine your output file type. You can choose from JPEG, PSD, and TIFF (JPEG is the default and generally works well, but if you are working with layered files, then PSD is a good choice).
If you do decide to save JPEGs, you can adjust the output quality; 12 will give you large, great-looking photos, whereas 1 will give you tiny, low-quality results.
For better color when displaying your photos on the web, select Convert Profile to sRGB and we also recommend checking the Include ICC Profile box at the bottom:
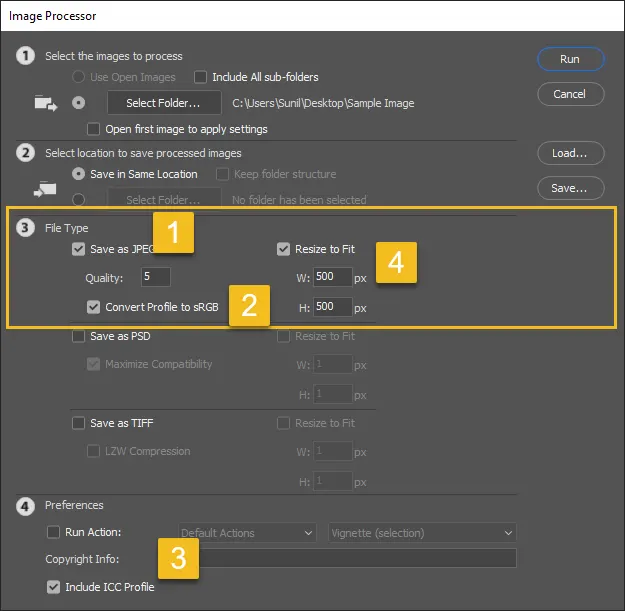
Finally, select Resize to Fit, and type in your preferred file size!
Step 5: Run the script
When you are ready, click Run.
The images will be automatically opened (if they are not open already), resized, saved, and closed again.
Conclusion
Well, there you have it. The easiest way to batch resize your images in Photoshop.
So whenever you need to resize a lot of images for uploading on the web, use the Photoshop Image Processor. It makes the job quick and painless!
Similar articles you may like
- Best Icon Fonts For UI Design
- How to Use Flaticon as Font Icon
- Cyotek WebCopy: Copy Entire Websites To Your Local Machine
- 6 Tools to Create Elegant Code Screenshots for Social Media


Add comment