

Git guides you through every step of the file status life-cycle. If you look here, it specifies that the file readme.txt is ready to be committed, but there are no commits yet.
❗ Important
Once a file is in the staging area, you can unstage the file/untrack it using the git rm --cached <file_name> command.
How to make a commit
Once you have one or more changes to the staging area, you can commit them with a message using the following command.
$ git commit -m 'First commit'Here, -m flag is to represent your commit message.
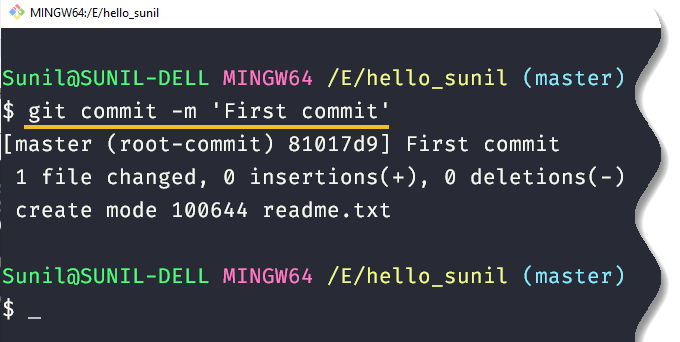
Congratulations, you have made your very first commit!
💡 Note
Saved changes are called commits. Each commit has an associated commit message, which is a description explaining why a particular change was made. Commit messages capture the history of your changes, so other contributors can understand what you have done and why.
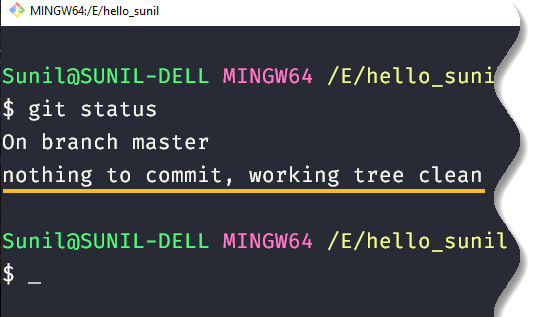
Now if you check the status, then it says that your working directory is clean. That means no new changes were made to any files in that directory.
How to create modification to your file
Now open readme.txt file and add some text into it.

If you check the git status now, then you will see the following message:
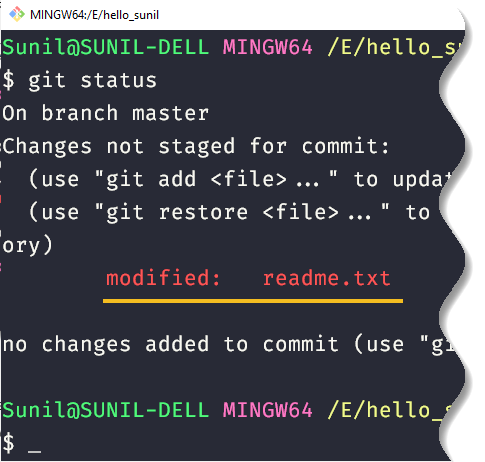
Git has tracked that you have modified the file. It does so by comparing the recent state of your file with the file that you previously committed.
Now you are at the very spot where you began. Meaning, you have to add the file and commit it as we did earlier. Try it yourself!
How to log your commit history
At this point, you already have done two commits. To see all of your commits, type the following command:
$ git log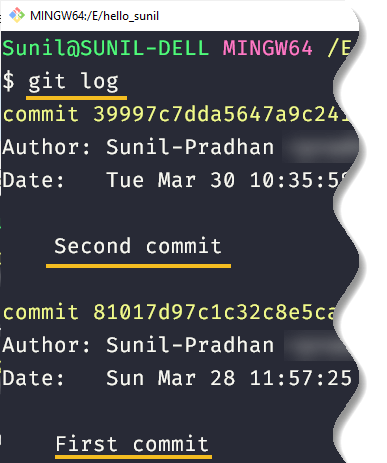
💡 Note
Your most recent commit is called the HEAD.
This command will list all of your commits along with other information like the timestamp of the commit, your username, and email that you set up earlier.
The long gibberish alpha-numeric value that you see is a hash that Git automatically creates to represent your commits. It is unique for every commit.
How to create a new branch
A branch is essentially another copy of your repo that will allow you to isolate changes and leave the original copy untouched.
Git by default creates a branch called master. It’s not special in any way other than it’s the one created initially. You can use branches to experiment and make edits before committing them to master branch.
Git is very flexible: you can have an indefinite number of branches active at the same time, and they can be developed independently until you want to merge one of them into another.
For example, if you want to add a new page to your website you can create a new branch just for that page without affecting the main part of the project. Once you are done with the page, you can merge your changes from your branch into the master branch.
When you create a new branch, Git keeps track of which commit your branch ‘branched’ off of, so it knows the history behind all the files.
Let’s first see the branches that your repository has by running the following command:
$ git branch

This command tells you what branches you have, and * indicates which branch you are currently on.
Now create a new branch for your project by using the following command:
$ git checkout -b <branch_name> 

-b creates a new branch, and checkout will move you to that branch off of the master branch.
After running the above command, you can use the git branch command to confirm that your branch was created:


When creating the new branch, that branch points to the latest commit made on the current branch. Run git log and you will see the same log as the branch that you branched off.


Note: It is better to keep your master branch clean. Let’s say you want to add a home page to your website. You have to create a new branch for that page and you have to branch off from the ‘new_home_page’ branch and not the master branch.
Once you are done with that branch, you can merge your changes from the branch you were working into the ‘new_home_page’ branch.
Pushing your code to GitHub
Till now the Git was running locally in your computer. If you want to collaborate with your friends, then you have to host your code in the cloud.
You can use GitHub to push your code in the cloud which allows you to host your Git repositories online and collaborate with others on them. GitHub can use through their web portal as well as the GitHub desktop GUI and the Git Bash Shell.
Let’s begin!
To create a new repo on GitHub, log in and go to the GitHub home page. You should see a + button at the top right corner of the screen near your user photo.Click the + button and then click the “New repository”.


Give your repository a name and a description. Then you can choose to make your repository either “Public” or “Private”. When you are done filling out the information, press the “Create repository” button to make your new repo.


Then GitHub will ask you if you want to create a new repository from scratch or if you want to add a repository you have created locally.
In this case, since you have already created a new repo locally, you want to push that onto GitHub so lets follow the “….or push an existing repository from the command line” section and copy the command from GitHub.


Then type the command as follows:
$ git checkout master
$ git remote add origin https://github.com/Sunil-Pradhan/GitHub_for_beginner.git
$ git push -u origin master
Enter your username and password on prompt, and now you have successfully pushed your code to GitHub.
💡 Note:
1) The command git remote add <remote_repository’s_URL> adds a new remote repository to the current repository.
2) The command git push sends your local changes to your remote changes.
3) When you copy (clone) a remote repository to your local machine, git creates an alias for you. In nearly all cases this alias is called “origin”.
It’s essentially shorthand for the remote repository’s URL. So, to push your local changes to the remote repository, you could have used either the command:
git push <alias> <remote_remote’s URL> <branch_name>
or
git push origin <branch_name>
Now go to your repository on GitHub and you will find your files there.


Wohoo! you are done.
Conclusion
That’s it for now, this is what Git and GitHub at a fundamental level. We have also made a Git command cheat sheet which will be handy for you while working in your project.
This is our first article on Git and GitHub, we will look more into Git’s advance command in our upcoming articles till then please do share your feedback and comments on this article.

