You have finished creating your HTML website and you are feeling proud of your hard work. But there is one thing that is still missing: you have no idea how to publish your website.
GitHub is not only a great place to store and share your code with others but they also offer free web hosting of your HTML, CSS, and JavaScript projects!
In this article, you will learn how to publish a webpage to the world. There are many different ways it can be done, but this time we will use GitHub, which is free and easy to use.
Step 1: Create a GitHub Account
First thing’s first: get yourself a GitHub account!
Step 2: Creating a New Repository
Next, we will create a repository. A repository is like a project folder that helps you manage one webpage or application on GitHub.
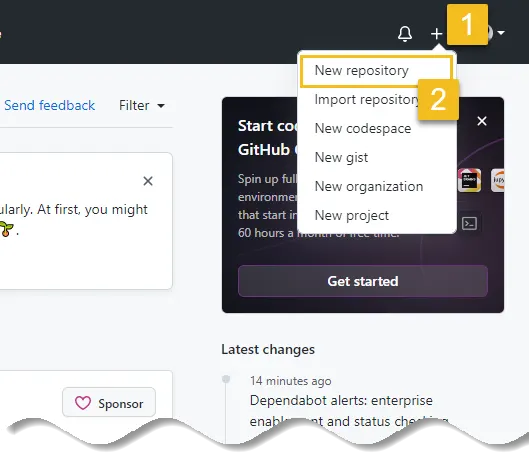
Like the image below, click the + (plus sign) icon on the upper-right and select New Repository.
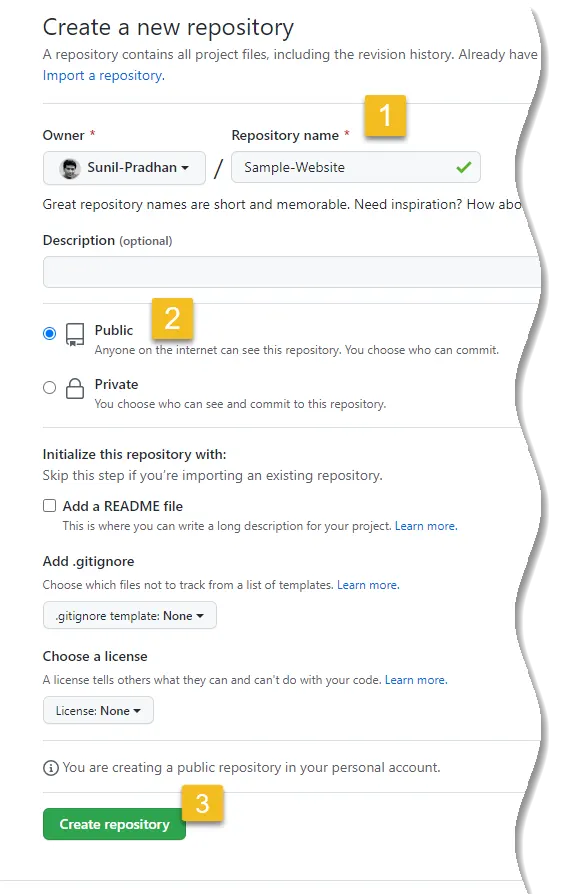
Give the repository a name by entering it in the form labeled Repository name in the middle of the page. The repository name can be anything, but the URL of the webpage will depend on this repository name.
Once you have entered the repository name, click the green Create repository button.
Step 3: Uploading Files
Let’s upload the site file to GitHub by clicking – Uploading and existing file.
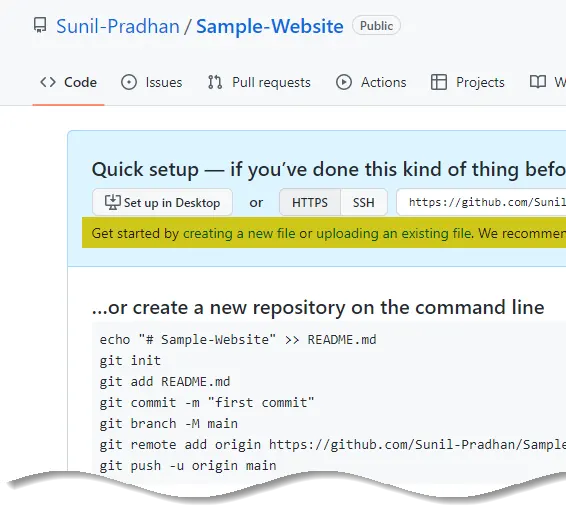
Drag and drop HTML, CSS and other files in the middle of the screen shown. You can also upload by clicking choose your files.

Once you have successfully uploaded the files, you can save the change by clicking the green button Commit changes.
From the screen below, you can check all the files uploaded.
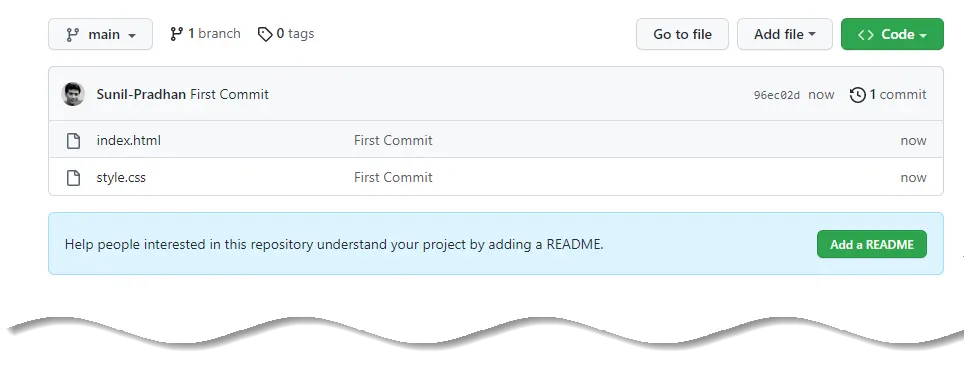
You can check the content of each file by clicking the file name to make sure that everything has been uploaded correctly.
Step 4: Publishing Your Webpage
Please take note of the below changes from GitHub when instructed on using the default branch.
❗ Notice
As of 1 October 2020, new repositories created on GitHub will have the default branch named as main instead of master.
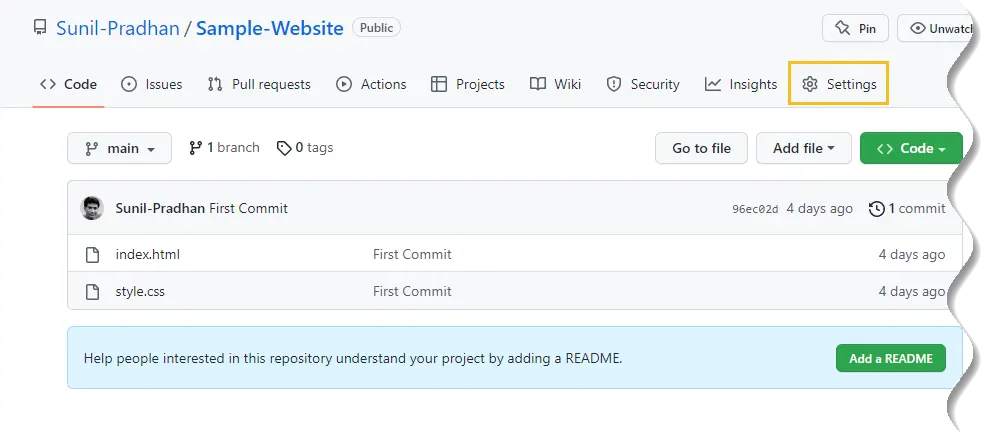
First, click the Settings tab on top right of the screen.
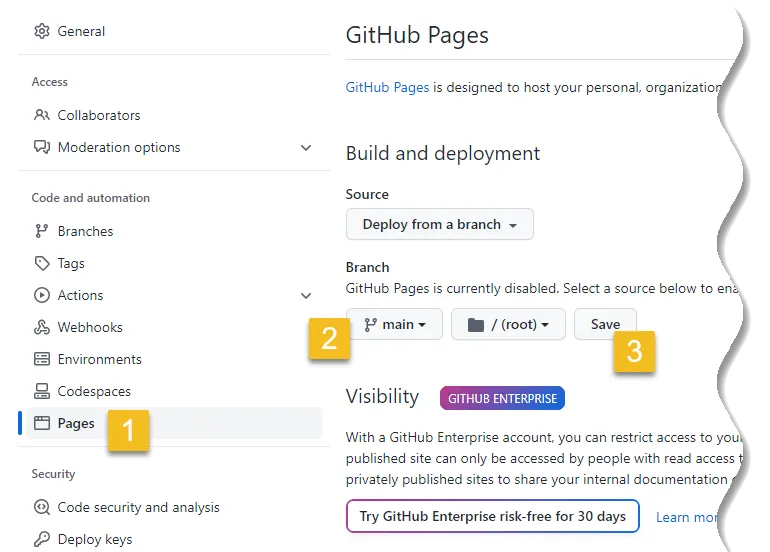
Click on Pages which is found in the menu on the left side of the Settings page.
If it says “Your site is live at …” where the green background is, the webpage is already published with the URL shown here.
If not, Branch is probably set as None, so change it to the default branch (master or main depending on when the repository was created) and then click the button Save to display the URL.
This is the end of the procedure to publish your webpage to the internet. Now anybody can access the webpage you made with the URL!
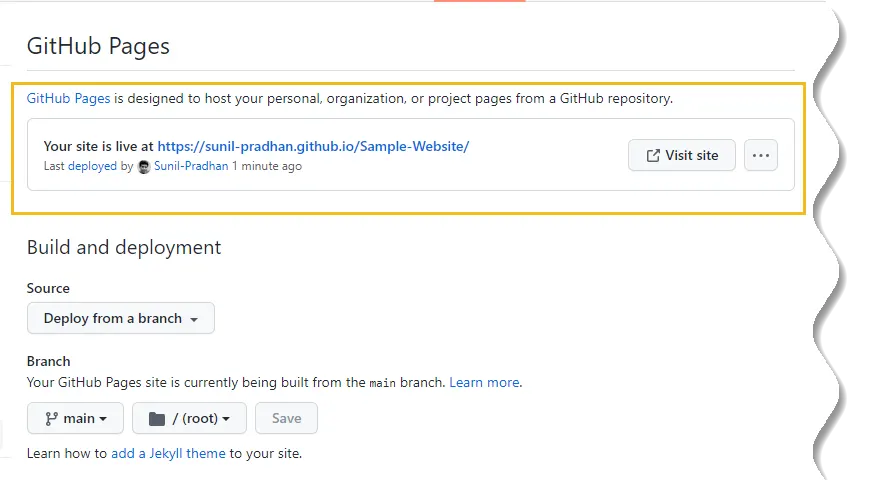
If nothing is shown when accessing the URL, there is a possibility that the display page is being processed. It may take a while, so try coming back and loading the page later.
Conclusion
This is the end of the tutorial about publishing a webpage by using GitHub.
From here you can see your files are on GitHub and you can view your project in the browser!
Whenever you want to make changes to your website, you just need to commit the changes and then push the files up to your GitHub repository. Your changes will be published automatically!
Let us know if we missed any steps, if something didn’t work out quite right for you, or if this guide was helpful! Thank you for reading! 💻😄💖


Add comment