GitHub repositories usually contain a README.md file which contains information that is commonly required to understand what the project is about. Here the “.md” extension stands for ” Markdown.”
Markdown is a way to style text on the web. You control the display of the document; formatting words as bold or italic, adding images, and creating lists are just a few of the things you can do with Markdown.
README.md is the landing page of your code. A well structured and beautiful README is very important, especially for opensource projects. This is the first thing that visitors will see when they discover your project.
This article is a small and handy Cheat sheet for your next Markdown, use it as a reference while creating your next README file.
Headers
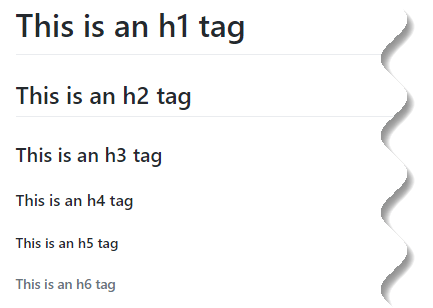
To create a heading, add one to six “#” symbols before your heading text. The number of “#” you use will determine the size of the heading.
# This is an h1 tag
## This is an h2 tag
### This is an h3 tag
#### This is an h4 tag
##### This is an h5 tag
###### This is an h6 tag
Output
Emphasis
*This text will be italic*
_This will also be italic_

**This text will be bold**
__This will also be bold__

_You **can** combine them_
Output

Also Read: How to add color to Github’s README.md file
Lists
Unordered
* Item 1
* Item 2
  * Item 2a
  * Item 2b
Output

Ordered
1. Item 1
1. Item 2
1. Item 3
   1. Item 3a
   1. Item 3b
Output

Links
You can create an inline link by wrapping link text in brackets “[ ]”, and then wrapping the URL in parentheses “( )”.
https://hello-sunil.in - It's me :)
[Hello Sunil](https://hello-sunil.in)
Output

Blockquotes
You can quote text with a “>” symbol.
As William James said:

> The greatest discovery of my generation is that
> human beings can alter their lives by altering
> their attitudes of mind.
Output

For nested blockquotes you need to add “>>” before your quote.
> Success is a state of mind. If you want sucess, start thinking of yourself as a success.
>> -DR. Joyce Brothers

Inline code
I think you should use an
`<addr>` element here instead.
Output

Images

Here my certification is “alt” tag and “/img/my-certification.png” is your image path.
Output

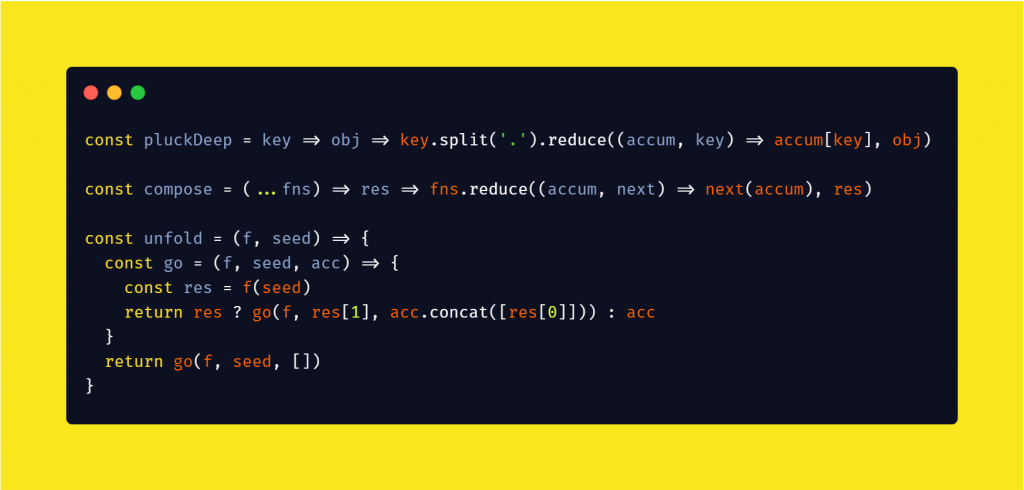
Note: If you want to showcase your code screenshots in README file then you should use Carbon.
Carbon is a very popular open source project that allows you to easily create aesthetically pleasing code screenshots, along with a plethora of customization options and community plugins.
Here is one example screenshot for you:
But have you ever thought, how can you center an image in a README.md file. Here is one example for you:

You can achieve this by using following Markdown:
<p align="center">
  <img width="500" height="208" src="https://github.com/Sunil-Pradhan/git-cheat-sheet/blob/master/img/Git-Cheat-Sheet-Logo.png">
</p>
Note: Do not forget to add width and height of the image.
For more image alignment tricks you can read – Guide to aligning images in GitHub README.md files.
Backslash escapes
GitHub allows you to use backslash escapes to generate literal characters which
would otherwise have special meaning in Markdown’s formatting syntax.
\\This is an example of backslash\\

\*This is an example of asterisk\*

\`This is an example of backtick\`

\_This is an example of underscore\_

\{This is an example of curly braces\}

\[This is an example of square brackets\]

\(This is an example of parentheses\)

\#This is an example of hash mark\#

\+This is an example of plus sign\+

\-This is an example of minus sign (hyphen)\-

\.This is an example of dot\.

\!This is an example of exclamation mark\!
Output

GitHub also uses its own version of the Markdown syntax known as “GitHub Flavored Markdown (GFM)“. It provides an additional set of useful
features which make it easier to work with content on GitHub.
Fenced code blocks
GitHub Flavored Markdown (GFM) can wrap your code with triple back-tick symbol to create a code block without the leading spaces.
```
Sample code goes here...
```
Output

Add an optional language identifier and your code will get syntax highlighting.
```javascript
hello = () => {
  return "Hello Sunil!";
}
```
Output

Tables
You can create tables by assembling a list of words and dividing them with hyphens (-) (for the first row), and then separating each column with a pipe (|):
First Header | Second Header
------------ | -------------
Content from cell 1 | Content from cell 2
Content in the first column | Content in the second column
Output

Automatic linking for URLs
Any URL (like https://hello-sunil.in/ ) will be automatically converted into a clickable link.
Kindly visit our site: https://hello-sunil.in/
Output

Strikethrough
Any word wrapped with two tildes (like ~~this~~) will appear crossed out.
React is better than ~~AngularJS~~
Output

Emoji
GitHub also supports Emoji, which you can use on your README file.
:grinning: :sunglasses:
Output

To see the complete list of Emoji supported by GitHub, check out this link.
Table of contents
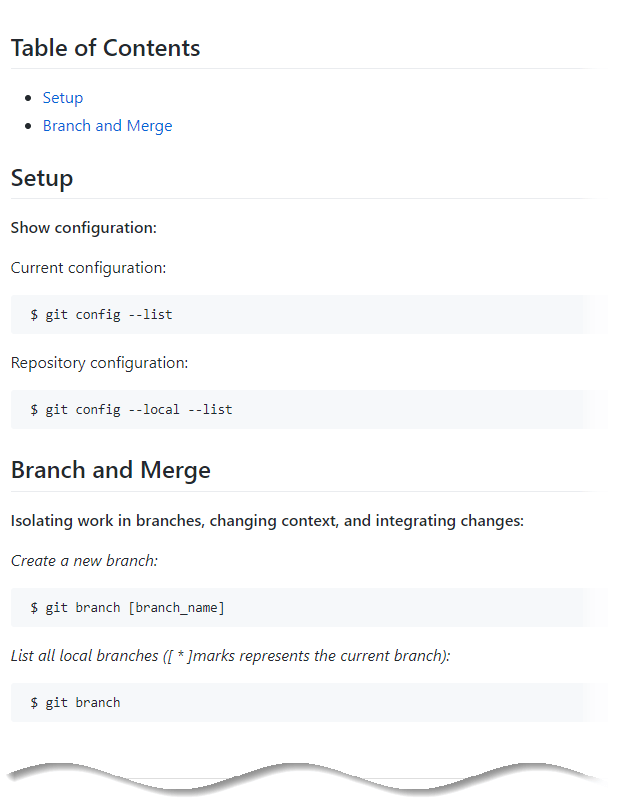
Table of contents comes in handy in case of extensive documentation for your project. It can work as a simple list with the links to the headings.
GitHub automatically adds “id” to headings according to the content inside a tag (spaces will become a sign “-“). Therefore, the links are constructed this way: https://github.com/user/repo-name#header-name.
It enables to create a simple table of contents, example.:
## Table of Contents
* [Setup](#setup)
* [Branch and Merge](#Branch-merge)

<a name="setup"></a>
## Setup

**Show configuration:**

Current configuration:

```
$ git config --list
```

Repository configuration:

```
$ git config --local --list
```

<a name="Branch-merge"></a>
## Branch and Merge

**Isolating work in branches, changing context, and integrating changes:**

*Create a new branch:*

```
$ git branch [branch_name]
```

*List all local branches ([ * ]marks represents the current branch):*

```
$ git branch
```
Output
Task lists
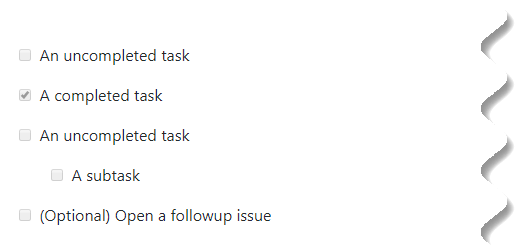
You can use task lists to create a list of items with checkboxes within Markdown files in your repository.
Task lists render as read-only checkboxes in Markdown files. People with write permissions in the repository can edit the file to select or unselect the checkboxes.
To create a task list, preface list items with a regular space character followed by [ ]. To mark a task as complete, use [x].
- [ ] An uncompleted task
- [x] A completed task

- [ ] An uncompleted task
  - [ ] A subtask

- [ ] \(Optional) Open a followup issue
Output
But remember, if a task list item description begins with a parenthesis, you will need to escape it with \.
Horizontal line
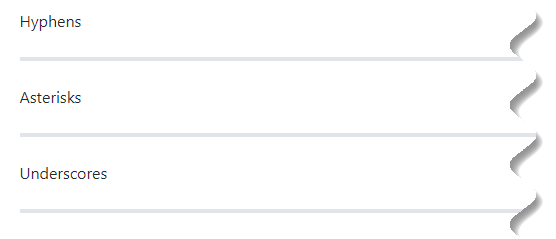
You can create a horizontal rule by placing three or more hyphens, asterisks, or underscores on a single line by themselves.
Hyphens

-----

Asterisks

*****

Underscores

_____
Output
Collapsible section
You can create collapsible section on your Markdown by using following method:
<details>
  <summary>Click to expand!</summary>

  #### Hey! I am collapsible section.

  Here is some more text that was hidden before.
</details>
Output

How to use keyboard icon in Markdown
Sometime while documenting your Markdown you need to use keyboard key combination. One small example would be:

You can achieve this by wrapping it with <kbd> tag. kbd is the abbreviation for keyboard.
To send the email: <kbd>CTRL</kbd> + <kbd>D</kbd>
Here are the few other hotkeys from your keyboard which you might need to use on your Markdown.
| Key | Symbol |
|---|---|
| Option | ⌥ |
| Control | ⌃ |
| Command | ⌘ |
| Shift | ⇧ |
| Caps Lock | ⇪ |
| Tab | ⇥ |
| Esc | ⎋ |
| Power | ⌽ |
| Return | ↩ |
| Delete | ⌫ |
| Up | ↑ |
| Down | ↓ |
| Left | ← |
| Right | → |
How to embed a YouTube video in GitHub Markdown
It’s not possible to embed YouTube video directly in your Markdown, but you can put an image which links to a YouTube video.
[](http://www.youtube.com/watch?v=YOUTUBE_VIDEO_ID_HERE)
Output

Remember you need to replace “YOUTUBE_VIDEO_ID_HERE” by the actual YouTube video id. Here is one example for you.
[](http://www.youtube.com/watch?v=GksehGJccqQ)
Output
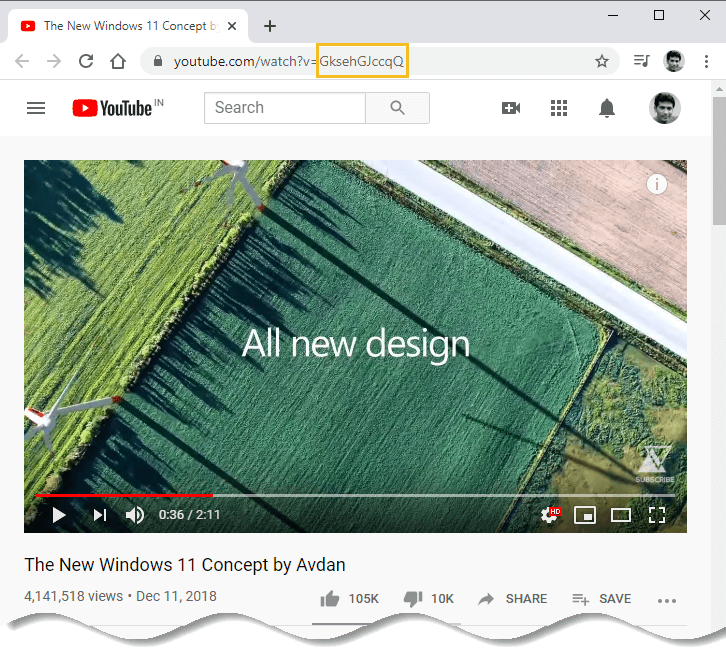
This image will be clickable, which leads you to the YouTube site. This is still not embedding a video but that’s a bit nicer and a much better incentive to click to watch the video.
For more customization you can read an article from Stackoverflow.
How to add animated GIFs to your GitHub README
Images and videos capture our attention more than static code on GitHub. Clearly it is a great tool for version control and collaborating on project. By adding animated GIFs in a README file can potentially increase visibility of your project on GitHub.
Here is one example project from GitHub which uses animated GIFs in its README file to demonstrate project usability: Farmers Market Finder
Unfortunately, animated GIFs can’t normally be as long as videos, but you can use them to quickly show off some core functionality of your project.
How to create an animated GIF?
Here are couple of apps you can use to create animated GIF screen recordings.
Windows:
- ScreenToGif
- Snagit (Screen capture, video and GIFs recording)
Mac:
- Kap
- Gifox
- Gifski
- GIPHY Capture
- Snagit (Screen capture, video and GIFs recording)
- Asciinema (Record your terminal sessions)
Linux:
- Asciinema (Record your terminal sessions)
Adding the animated GIF to your README
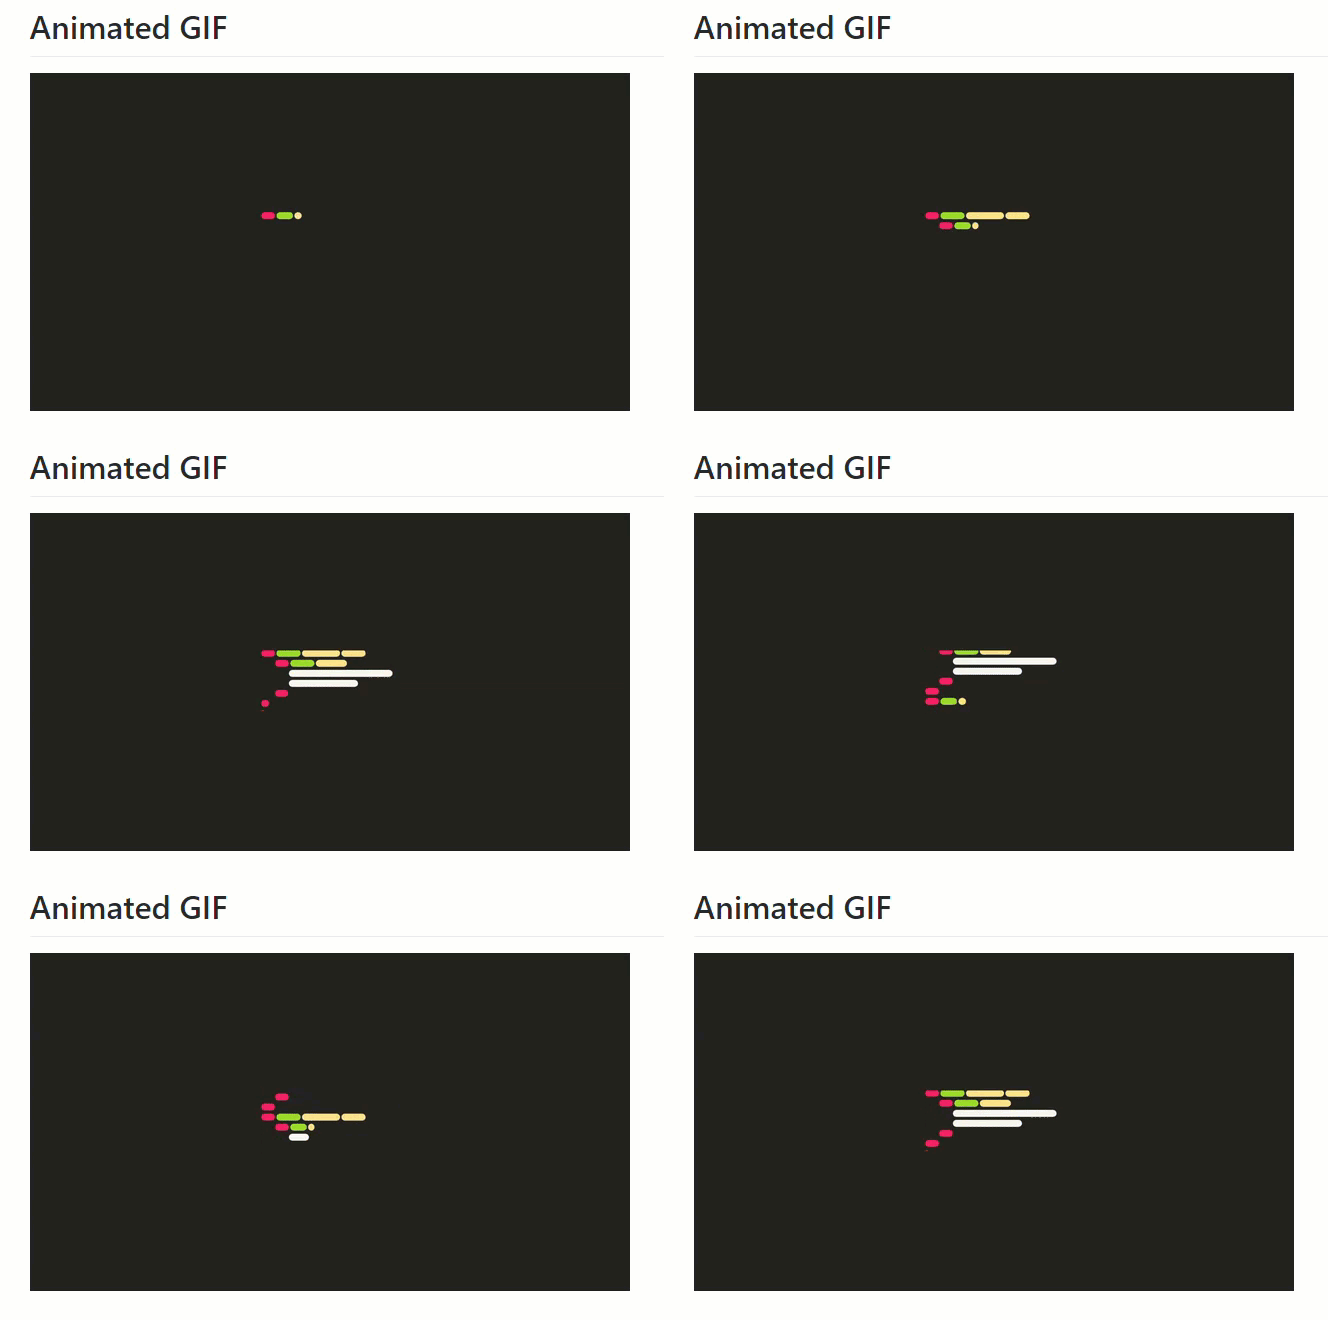
Once you have created the animated GIF, you can embed it in your README.md file like you would a regular image.
Create a directory in your GitHub repository and named is anything like “img or images” and upload the GIF there, then link to it in the README.

Remember, the alt text is what goes between the square brackets and then the URL to the GIF goes between the parentheses.
If the image is in your GitHub repository, you can also use a relative link:

Output
For more customization you can read an article from Stackoverflow.
But we all knows, GIFs are a horribly inefficient, lossy format in comparison to SVG.
There are some very popular open source projects on GitHub that have started using more efficient animated SVG for their demos, such as create-react-app.
Animated SVG has advantage of sharper and smaller file size output in comparison to GIF. So, lets learn how you can enhance your README with animated SVG.
How to enhance GitHub README with animated SVG
Here are couple of apps you can use to create animated SVG screen recordings.
Mac:
Linux:
How to create animated SVG by using Asciinema tool
For this demonstration we are going to use Ubuntu Linux. To create animated SVG from terminal follow these steps:
Step 1: Installing “asciinema” is super simple and it is available for almost all Linux distributions, to install on Ubuntu type the following command one after the other in terminal:
sudo apt-add-repository ppa:zanchey/asciinema
sudo apt-get update
sudo apt-get install asciinema

Step 2: Once installed, you can initiate recording by typing the following command in terminal:
asciinema rec demo
The “rec” command will start recording your terminal session after which you will have an option to either discard your recording or upload it on asciinema.org website for a future reference.
Once you run the above command, you will be notified that your asciinema recording session has started, and that the recording can be stopped by entering “CTRL+D” key sequence or execution of “exit” command.
Now, asciinema will start to record the terminal activities and save them in a file called “demo” in the current working directory.

You can play the recorded terminal session with the following command:
asciinema play demo
Replace “demo” with your filename.
Another extremely useful asciinema feature is time trimming. If you happen to be a slow writer or perhaps you are doing multitasking, the time between entering and execution of your commands can stretch greatly.
Asciinema records your keystrokes real-time, meaning every pause you make will reflect on the length of your resulting video. Use “-w” option to shorten the time between your keystrokes.
For example, the following Linux command trims the time between your keystrokes to 0.2 seconds:
asciinema rec -w 0.2
Now that you know how to record your Linux terminal, let’s throw some SVG into the mix.
Step 3: We are now moving onto svg-term-cli, which is a simple script for converting asciinema made recordings into fully animated SVG. But this script has two dependencies and they are Node.js and npm.
First install Node.js by using the following command in your terminal:
sudo apt-get install nodejs

Step 4: Then install npm by following command:

Step 5: Now install svg-term-cli, by using the following command:
sudo npm install -g svg-term-cli

Step 6: Now start recording of your terminal by using following command:
asciinema rec demo -i 5
This command give the instruction to asciinema, start recording after 5 seconds and once user hit “CTRL +D” on keyboard then save it in “demo.json” file name.

Step 7: You can store the recording locally as an SVG file by typing the following command:
cat path-to-your-cast-file | svg-term --out demo.svg --window

Step 8: Now you can embed the animated SVG file in your README by using the following Markdown:
<p align="center">
  <img src="https://github.com/Sunil-Pradhan/demogist/blob/master/img/demo.svg?sanitize=true" width="572" alt="newsletter cli demo">
</p>
Output

How to add badges in a GitHub repository
Adding badges to the README file of GitHub repositories is a common task for almost every new GitHub repository. These badges help in increasing the readability of the README file because they provide some metrics about the GitHub repositories.
The badges that can be added to the repositories cover several topics and areas starting from the licence of the project to the open issues count for the project.
But how many times have you wondered how it works? And how to do it? Then, here are the step by step instructions to enhance the quality of the README file for your GitHub repositories by adding badges.
Step 1: Go to shields.io, which is a popular site to host concise, consistent, and legible badges in SVG and raster format.

Let’s create a custom badge for a GitHub repository by using the following link.
Now you will be brought down the page to a tool that lets you create your own badges. This is quite helpful if you want to make a static badge that either relies on human input or just does not change.

Step 2: Entering a value in “subject” will provide the text for the left, “status” the value for the right and “color” the color of the right part of the badge.
For example if you want to create a badge that says “Made with” and then “Bootstrap” with an orange background, you will mention as follows:
Now click on “Make Badge” button which will generate for you a custom badge which says – “Made with – Bootstrap”.

Step 3: Now enter the following Markdown in your README file.
<img src="https://img.shields.io/badge/Made%20with-Bootstrap-orange" alt="Made with Bootstrap">
Remember, you need to change “src” of your custom badge with “alt” attribute.
Output

But we know Bootstrap’s brand color is purple not orange. You can fix this by using hex color code in your Markdown as follows:
<img src="https://img.shields.io/badge/Made%20with-Bootstrap-7952B3" alt="Made with Bootstrap">

There are other badges also present according to your project needs so that we have compiled few more resources for you to try later:
- Code repository badges
- Markdown License badges
- List of badges, in Markdown
- Creating your own static badges
- Open Source & Licences Badges
- Add badges to a GitHub repository
- Earn a build passing badge on GitHub
- How to use GitHub badges to stop feeling like a noob
Also Read: 5 Must have badges to add in your README
How to display GitHub contributors in README
Sometimes you start a project alone but gradually its popularity grows enormously among users. You also start to attract other open source developer who are interested to join and start contributing in your project.
But how do you recognize those contributions? It’s easy!! just show their profile photo as contributors.
Follow these quick steps to generate contributors profile photos for your README file:
Step 1: Go to contributors-img.
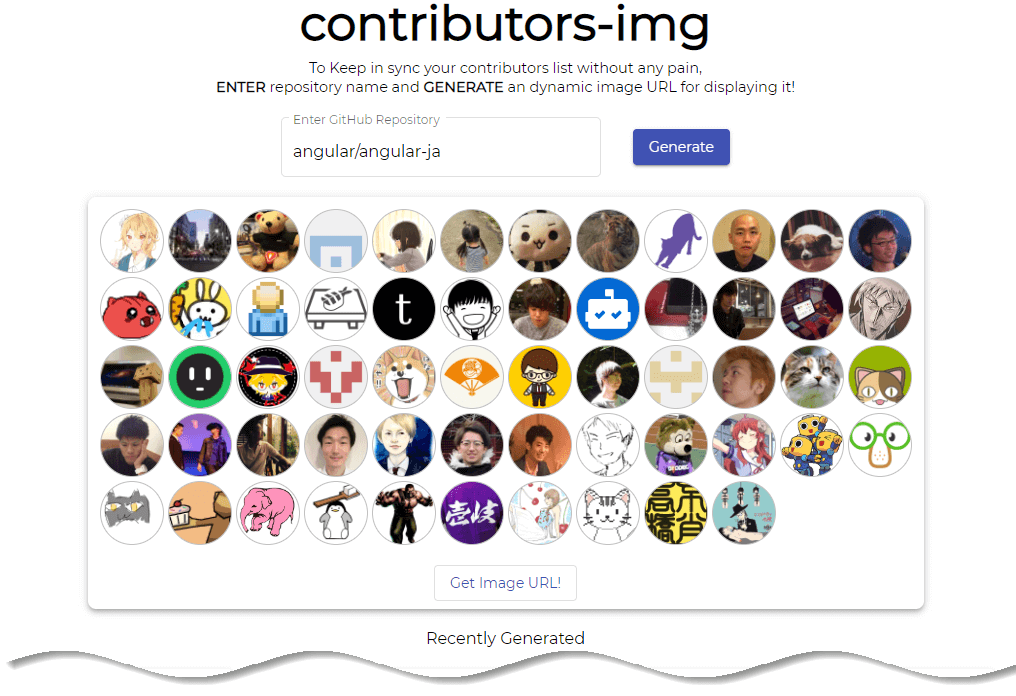
Step 2: Enter “GitHub username/repository name” as illustrated for “create-react-app” from Facebook. Then click on “Generate” button.

Step 3: Click “Get Image URL” to generate link for your README.

Step 4: Now copy the link and use it in your README file.

Once you paste the generated image’s URL in README.md, it will keep contributors list in sync without any effort.
There are few other solutions also available which you can try:
- Generate contributors profile image by Open Collective
- Generate contributors profile image by All contributors
Note: If you are using All Contributors to acknowledge contributions, you can use their emoji key to denote different contributions types.
How to Markdown using Visual Studio Code
GitHub website has a built-in simple editor for README.md file to edit but it has a few limitations and they are:
- If you accidentally refresh the page, you lose your changes
- You have to switch between the editor and the the preview every time you want to see the result.
You might ask then, what code editor can handle Markdown from the get-go? Well, the most practical one is obvious: Visual Studio Code!
By default, Visual Studio Code (VS Code) has been equipped to compile Markdown. So here is a quick step by step guide of creating Markdown file using VS Code.
Step 1: Open VS Code and go to “File” -> “Open Folder”.

Select a folder that you wish to store the Markdown file into.
Step 2: Create a new file using .md extension.

Step 3: Now start writing your Markdown in VS Code. Let suppose, you want to write one heading and few paragraph with bullet list of items, then your Markdown would be:
# India

India (Hindi: Bhārat), officially the Republic of India (Hindi: Bhārat Gaṇarājya),is a country in South Asia. It is the seventh-largest country by area, the second-most populous country, and the most populous democracy in the world. Bounded by the Indian Ocean on the south, the Arabian Sea on the southwest, and the Bay of Bengal on the southeast, it shares land borders with Pakistan to the west; China, Nepal, and Bhutan to the north; and Bangladesh and Myanmar to the east. In the Indian Ocean, India is in the vicinity of Sri Lanka and the Maldives; its Andaman and Nicobar Islands share a maritime border with Thailand and Indonesia.

## Contents

* History
* Geography
* Politics and government
  * Politics
  * Administrative divisions
Step 4: You can preview your Markdown by clicking on “Open preview to the side” magnifier button.

Step 5: Voila! You can now write in Markdown and see the results in real-time, all within VS code.

To get even more power from Markdown editing in VS code, you can also try these cool extensions:
- Markdownlint
- Markdown PDF
- Markdown TOC
- Markdown Image
- Markdown Emoji
- Markdown+Math
- Markdown Shortcuts
- Markdown All in One
- Markdown Extended
- Markdown Checkboxes
- Markdown Preview Enhanced
There are also few online editor available where you can edit your Markdown file and see real time preview. Here are few examples:
How to write a good README for your GitHub project
Arguably the single most important piece of documentation for any open source project is the README. A good README not only informs people what the project does and who it is for but also how they use and contribute to it.
A good README tells you everything you need to know to use the project and get involved. A project with nice README and screenshots will get the attention of users better since it’s a direct way to explain why this project matters, and why people should use and contribute to the project.
Here is what you should consider including to your README for maximum impact.
Name: Don’t forget to give your project a name.
An introduction or summary: Write a short two or three line introduction explaining what your project does and who it is for. Also leave out headings like ‘Introduction’, ‘Summary’ or ‘Overview’.
Prerequisites: Immediately after your introduction add a section titled listing any prerequisite knowledge or tools anyone who wants to use the project might need before they begin.
How to install: Provide installation steps and make sure to break the installation down into numbered steps if it requires multiple steps.
How to use: Add steps for how to use the project once the user has installed it. Make sure to include usage examples and a reference explaining command options or flags if you think they will be helpful. If you have more advanced documentation in a separate file or site, link to this from here.
How to contribute: Provide steps for contributing to the project. Alternatively you might want to create a contributor’s guide in a separate file and link to this from your README if you want people to read it before contributing pull requests to your project.
Add contributors: Credit any contributors who have helped with the project in an author section. It’s a nice way to make open source feel like a team effort and acknowledges everyone who has taken the time to contribute.
Add acknowledgements: Similarly, if you have used anyone else’s work (code, designs, images etc) that has a copyright that requires acknowledgement, you might want to add that here. You can also acknowledge any other developers or institutions who helped with the project.
Contact information: You might not want to do this because you are extremely private person but if someone has questions, wants to collaborate with you or is impressed enough with your project to offer you a job opportunity, it makes sense to have your contact details front and centre.
Add licence information: You definitely want to include licence information if applicable. Startups and other companies who rely on third-party software are unlikely to be able to use your project unless you provide this. Check out Choose a License or Opensource.org for a list of licences you may be able to use.
Resources
If you want more advice on READMEs, we would also recommend these resources:
README template
Take a look at these amazing template for your next README file which will get you up and running in no time.
- README template by Malgorzata Rita
- README template by Billie Thompson
- README template by Kira Oakley
Some inspiring project on GitHub and their README documentation
We have given some guideline how you can make your README awesome as well as few templates. But it is not enough, sometime we need Inspiration which helps us to document our project right way to target specific audiences. So here are few projects from GitHub which has an awesome README documentation.
Conclusion
In the end, you don’t need to reinvent the wheel. Use templates. Follow the guidelines above. Engage your community and be awesome towards your fellow developers! That’s what it’s all about. Helping each other create amazing software to benefit humanity.
On top of mastering Markdown formatting you will also demonstrate your ability to go beyond coding and document your work which is also a desirable skill in software industry.
Do you add anything else to your project documentation or any other tricks you use while documenting your README? Share it in a comment below!


Add comment