
One or two seconds might not seem like long. When it comes to your website, though, a lot can happen in that short span of time.
Sooooo…..
Do you want to make your site load faster and attract more traffic? You can do it all by compressing your web files using the GZIP file format.
In this post, you will learn the basics of data compression on the web, what GZIP compression is, its various benefits, and how you can use it to speed up your website on different server setups.
Sounds interesting?
Read on to find out how to enable GZIP compression on your site.
What is GZIP compression?
GZIP, short for GNU Zip, is the most popular lossless data compression method on the web.
GZIP is very similar to ZIP and RAR which is used to compress various file types. It can be used to compress all the files on your website, whether they are text, HTML, CSS, JavaScript, or XML.
GZIP compression occurs before files are served to your visitors’ web browsers. Through this method, GZIP compression reduces the file sizes, which can have a positive effect on website loading times.
Research by W3Techs shows that of the websites that compress their content, more than 53.8% employ GZIP.

Apart from being a data compression algorithm, GZIP is also a file extension (.gz) and a software used for file compression/decompression.
It’s based on the DEFLATE algorithm, which is a mixture of LZ77 encoding and Huffman coding algorithms.
Search engines better index sites that use data compression. The transfer of information in this format means faster loading of pages, as a result of which the user does not have to wait long.
As a result, submitting files in a compressed form positively affects the ranking of search engines and the loyalty of site visitors.
How to see if GZIP compression is enabled
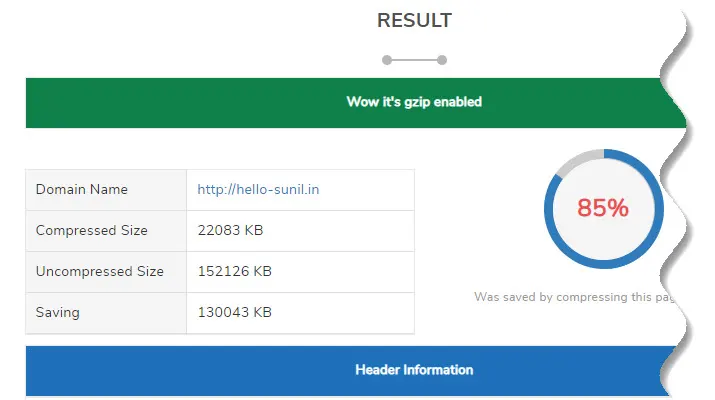
GZIP compression is popular, and many hosting platforms enable it by default. If you are unsure how to check if GZIP compression is working on your site, you can test for it using third-party solutions or in-browser developer tools.
If GZIP is already activated, the tool will show you the page size before and after the optimization. If it’s not, an error message will appear.
Third-party solutions provider list:
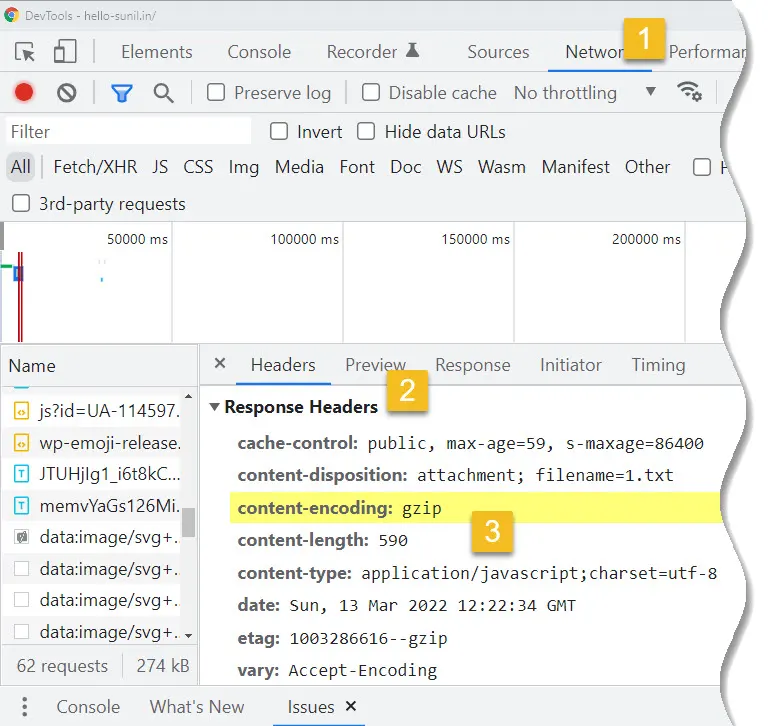
The second way to verify whether a website delivers GZIP compressed content is by verifying the content-encoding: gzip HTTP response header.
You can open up Chrome DevTools or Firefox Developer Tools and look for this response header under the Network section.
You can also enable the “Use large request rows” option in the Chrome DevTools settings panel to see both the original and compressed size of the page.
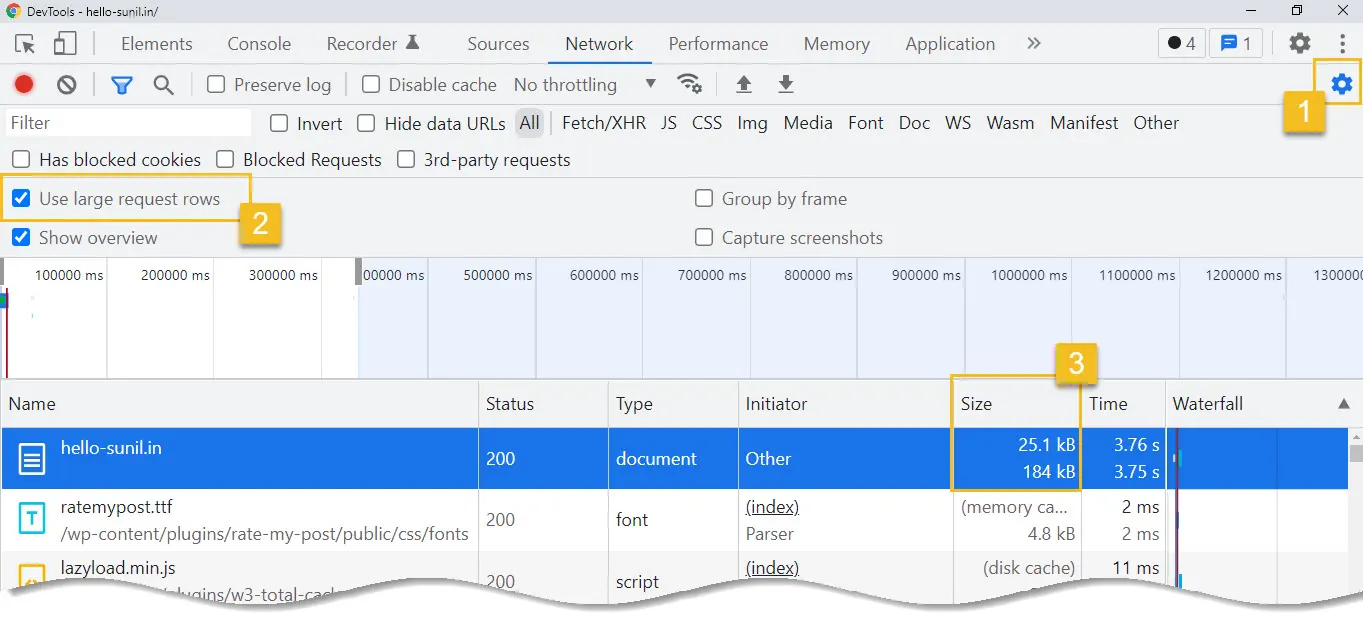
As you can see below, the original page’s size reduced from 184 KB to just 25.1 KB after compressing it with GZIP.
If the browser doesn’t detect the GZIP response header, it downloads the uncompressed files. In most cases, the difference in page load speeds can be multiple seconds.
Hence, if you don’t have GZIP enabled, you will see warnings in website speed testing tools.
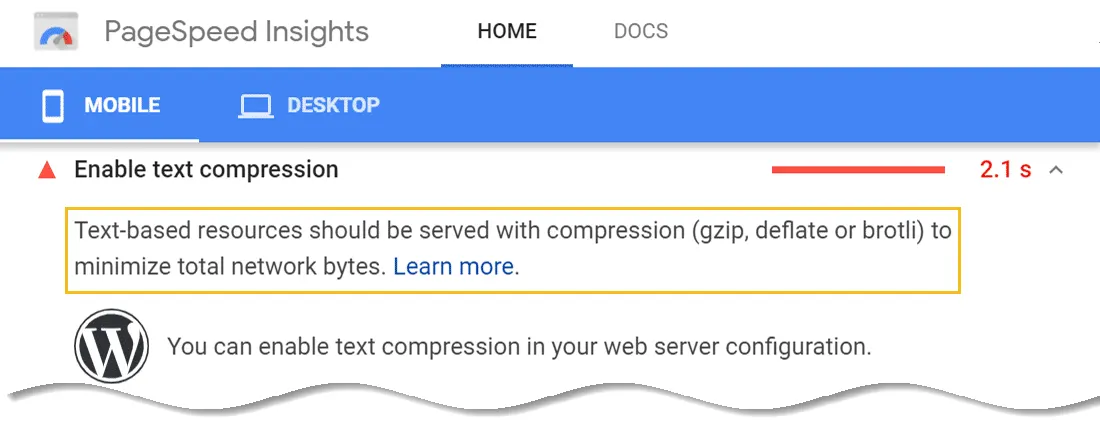
GZIP warning in Google PageSpeed Insights
Google PageSpeed Insights throws up a warning when you don’t have any text compression enabled on your website.
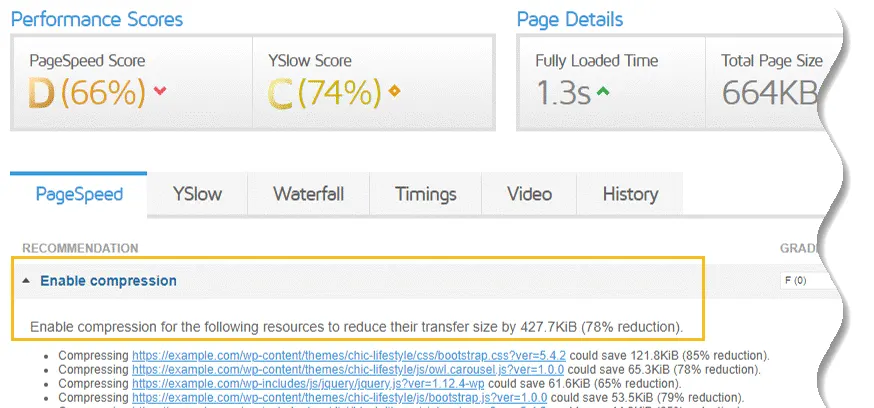
GZIP Warning in GTmetrix
GTmetrix shows a warning if your website doesn’t serve compressed text-based resources. Like Google PageSpeed Insights, it will also show you the potential savings you can achieve.
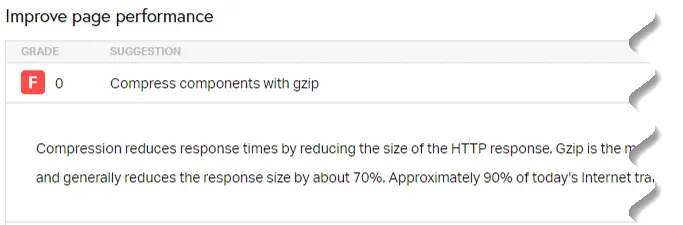
GZIP warning in Pingdom tools
Pingdom Tools throws up a straightforward warning to compress your website components with GZIP.
How to enable GZIP compression
If you don’t have GZIP compression enabled on your web server, there are many ways to go about enabling it. The exact method depends on which web server you’re using to host your website.
Enable GZIP on Apache web server
To enable GZIP compression on Apache servers, you need to use its mod_filter and mod_deflate modules and configure them properly with the right directives. They will direct Apache to compress server output before sending it to clients over the network.
You have two options to edit Apache’s server configs based on the access level you have:
- If you can access the main server configuration file (usually called
httpd.conf), you are recommended to use it to configure Apache as.htaccessfiles can slow down Apache. - If you can’t access the main server configuration file, which is usually the case with most shared hosting providers, then you need to configure Apache using
.htaccessfile.
The first option is strictly for system admins, as hosting providers rarely allow you to edit the main server configuration file.
The second option is ideal for most site owners as many shared hosting providers allow you to edit .htaccess files.
Add the following code to your .htaccess file, then save the file:
<IfModule mod_deflate.c>
  # Compress HTML, CSS, JavaScript, Text, XML and fonts
  AddOutputFilterByType DEFLATE application/javascript
  AddOutputFilterByType DEFLATE application/rss+xml
  AddOutputFilterByType DEFLATE application/vnd.ms-fontobject
  AddOutputFilterByType DEFLATE application/x-font
  AddOutputFilterByType DEFLATE application/x-font-opentype
  AddOutputFilterByType DEFLATE application/x-font-otf
  AddOutputFilterByType DEFLATE application/x-font-truetype
  AddOutputFilterByType DEFLATE application/x-font-ttf
  AddOutputFilterByType DEFLATE application/x-javascript
  AddOutputFilterByType DEFLATE application/xhtml+xml
  AddOutputFilterByType DEFLATE application/xml
  AddOutputFilterByType DEFLATE font/opentype
  AddOutputFilterByType DEFLATE font/otf
  AddOutputFilterByType DEFLATE font/ttf
  AddOutputFilterByType DEFLATE image/svg+xml
  AddOutputFilterByType DEFLATE image/x-icon
  AddOutputFilterByType DEFLATE text/css
  AddOutputFilterByType DEFLATE text/html
  AddOutputFilterByType DEFLATE text/javascript
  AddOutputFilterByType DEFLATE text/plain
  AddOutputFilterByType DEFLATE text/xml

  # Remove browser bugs (only needed for ancient browsers)
  BrowserMatch ^Mozilla/4 gzip-only-text/html
  BrowserMatch ^Mozilla/4\.0[678] no-gzip
  BrowserMatch \bMSIE !no-gzip !gzip-only-text/html
  Header append Vary User-Agent
</IfModule>
This will compress all HTML, CSS, JavaScript, XML, and font files. After saving, check your compression with any of the methods described in the previous section.
You can learn more about all the directives used here by going to its code repository and following all the resources linked in there.
Enable GZIP on Nginx web server
You can enable GZIP compression on your Nginx web server by using the directives defined in the ngx_http_gzip_module.
To start off, add the directives given below to your nginx.conf file. Typically, you can find this file in your server’s /etc/nginx/nginx.conf location.
# enables GZIP compression
gzip on;

# compression level (1-9)
# 6 is a good compromise between CPU usage and file size
gzip_comp_level 6;

# minimum file size limit in bytes to avoid negative compression outcomes
gzip_min_length 256;

# compress data for clients connecting via proxies
gzip_proxied any;

# directs proxies to cache both the regular and GZIP versions of an asset
gzip_vary on;

# disables GZIP compression for ancient browsers that don't support it
gzip_disable "msie6";

# compress outputs labeled with the following file extensions or MIME-types
# text/html MIME-type is enabled by default and need not be included
gzip_types
application/atom+xml
application/geo+json
application/javascript
application/x-javascript
application/json
application/ld+json
application/manifest+json
application/rdf+xml
application/rss+xml
application/vnd.ms-fontobject
application/wasm
application/x-web-app-manifest+json
application/xhtml+xml
application/xml
font/eot
font/otf
font/ttf
image/bmp
image/svg+xml
text/cache-manifest
text/calendar
text/css
text/javascript
text/markdown
text/plain
text/xml
text/vcard
text/vnd.rim.location.xloc
text/vtt
text/x-component
text/x-cross-domain-policy;
If your site serves large JS and CSS files, then you can increase the buffer size used for compression by adding the following directive to your nginx.conf file:
# sets the 'number' and 'size' of buffers for GZIP compression
# default buffer size is 4K or 8K depending on the platform
gzip_buffers 16 8k;
Don’t forget to reload Nginx after saving your nginx.conf file.
sudo service nginx reload
Finally, you should test to see if your server has GZIP compression enabled. You can refer to Nginx documentation for an up-to-date list of all the ngx_http_gzip_module directives.
Enable GZIP on IIS Web Server
Microsoft’s Internet Information Services (IIS) is mainly deployed in enterprise environments running on Windows, especially for setting up company-specific intranet and extranet servers.
To enable GZIP compression on IIS, you can refer to Microsoft’s documentation to get started.
Enable GZIP with a WordPress Plugin
The easiest way to enable GZIP compression on your WordPress site is by using a caching or performance optimization plugin.
General FAQ
Reference & Further reading
Conclusion
GZIP compression technology is used to speed up the loading of site pages in conjunction with other actions. As a result, visitors will have a great user experience and your site can rank well in SERP.
Pretty easy, right? Let us know in the comments if you have any questions!


Add comment