
Google Search Console is a free tool that lets you see more information about your website’s search traffic performance.
In particular, you can see which search queries are generating traffic to your site. It also helps you identify technical issues that need to be fixed to improve your site’s ability to rank well in search engine results.
Before you set up Google Search Console, it pays to have Google Analytics up and running first. Then you are ready to follow our step-by-step guide to all things Google Search Console below.
How to set up a Search Console account
Step 1: Go to Google Search Console and Sign in. You will need to have a Google account for this method to work when setting up Search Console. If you already have Google Analytics or Gmail, you can use the same login.
Step 2: Once you have successfully logged in, click the ‘Add Property’ button at the top of the page on the left.
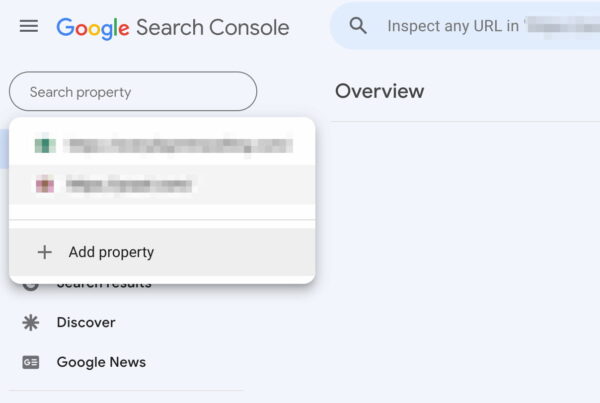
Step 3: Enter the URL or domain of your website, then click ‘Continue’.
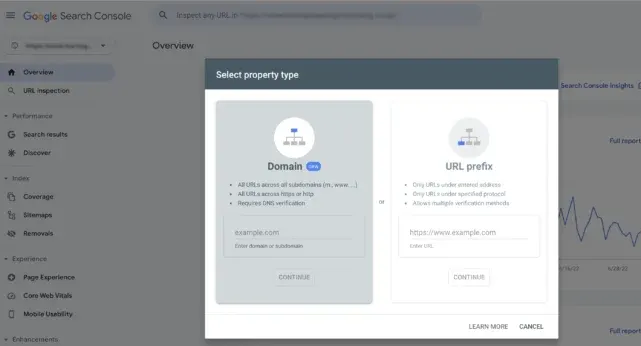
If you choose the new Domain option, you only need to add the domain name without www or subdomains. This option tracks everything connected to that domain.
Step 4: You will now be asked to verify that you ‘own’ the website. At this stage, we are assuming you are setting up a domain property.
If you are using a URL prefix property, you will see some different options on this screen.
So, there is only one way to verify a domain-level property, and that’s through your DNS provider. Here’s the screen you will start with.
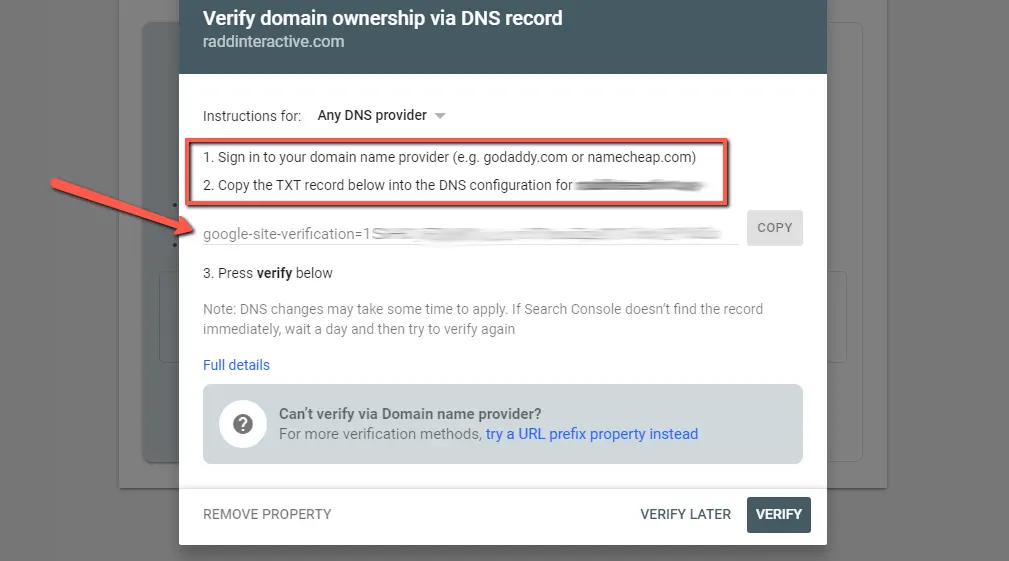
First, see if you can find your DNS provider (the company you pay to use your domain), this will display detailed instructions specific to your provider. If you don’t see your provider, you can leave it as “Any DNS service provider.”
Next, hit the “Copy” button to copy the TXT record provided to you by Google. Also, from July 2022, you can have the option to add a CNAME record instead of a TXT record to verify ownership.
Once you have copied the TXT record, open your domain registrar’s site in a new tab (for example GoDaddy, BlueHost, Hostgator, etc…) and log into your account with them.
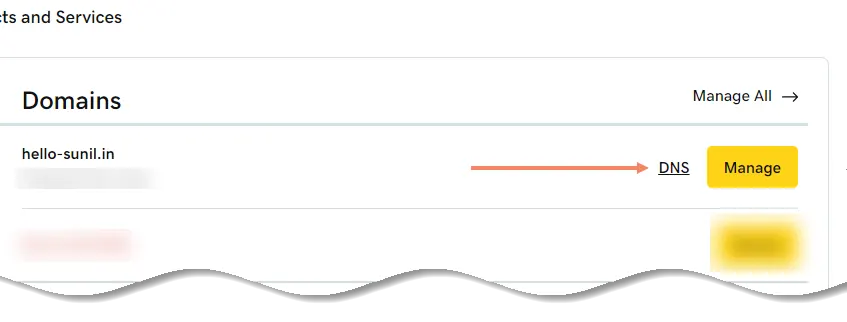
Navigate to the list of domains you own and select the one you wish to configure.
Find the option to manage your DNS records. This will be located in different places, depending on your provider’s site. Look for any mention of “DNS” and click it.
For example, on GoDaddy you would go to “My Account > My Products” and select “DNS” next to your domain.
You will then be brought to a Domain Management screen where you will find a list of your DNS Records. Select “Add” to create a new one.
Select “Type” choose TXT. Under “Host” type in the @ symbol. Leave “TTL” at 1 hour. And, most importantly, paste the TXT record you got from Google into the field for “TXT Value.” Then hit “Save.”
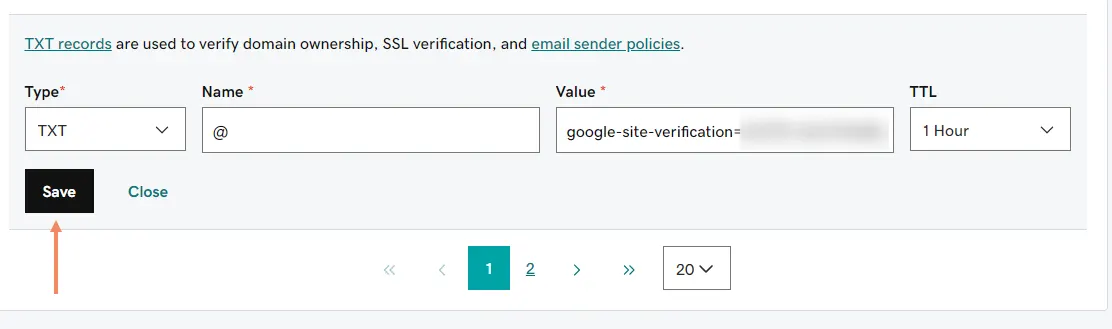
This will add a new TXT record for Google Search Console. (In case you are wondering, a TXT record is used to provide info about your domain to an outside source — e.g. show Google you own a domain.)
The process we just outlined above for GoDaddy is very similar for all domain providers. You can even use the same entries for “Type,” “Hostname,” and “TTL.” Some providers will ask for “TXT Record” instead of “TXT Value.”
With your TXT record added, return to the Google Search Console set up and select “Verify.”
If everything went according to plan, you should see a message like this:
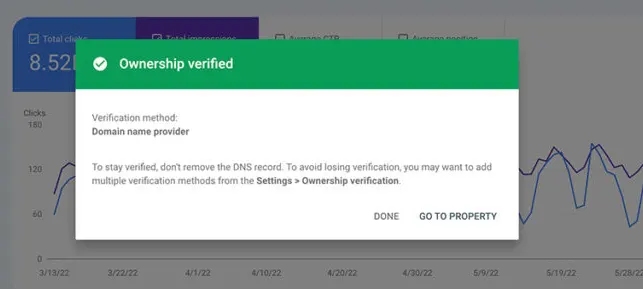
Keep in mind, updating DNS records can take up to 72 hours. If your ownership isn’t verified immediately, come back in a few hours or the next day, and check again.
Next Steps
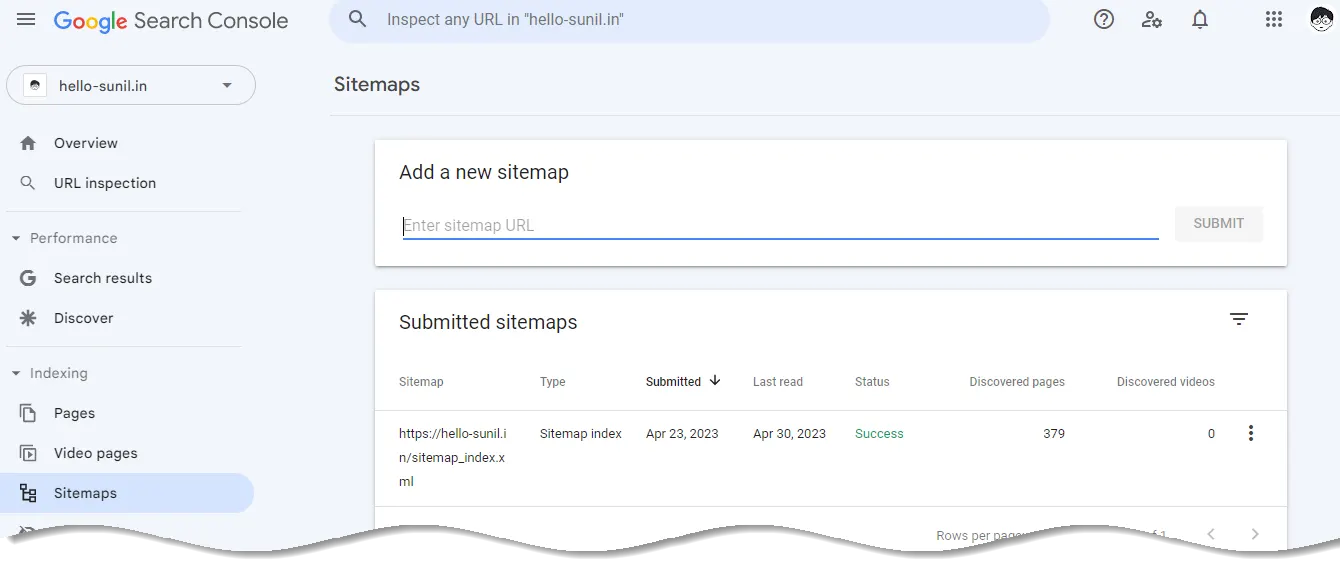
Once you are set up, you will have to wait around a week before any useful data shows up on Google Search Console. However, something you can do straight away is submit an XML sitemap.
An XML sitemap is a file that lists all the important pages on your website. This helps Google to find content on your site and index it more quickly.
Before you can submit a sitemap, you will need to create one. If you use WordPress, you can install the Yoast SEO plugin, which will automatically generate XML sitemaps for your site content.
Alternatively, there are many online tools that will create a sitemap for you (which you then need to upload to the root of your website).
Once your sitemap is live and created on your website, you can go to the sitemap section of the Google Search Console and click ‘Add a new sitemap’ shown in the left hand menu.
Done! All that remains now is to wait while your sitemap is ‘crawled’, ready for you to reap the rewards of using Google Search Console.


Add comment