In the last few years, as high resolution (HD) and 4K video files became the standard, the quality of the average video file dramatically improved. But with these advantages, there are also some challenges.
The average video file size increased and take lots of hard drive space. As an example, if you have a 1GB video file and you want to upload it on YouTube at a rate of 500KB/s, you will end up waiting about 35 minutes. That’s an unpleasant situation.
Also Read: 3 Quick Ways to Download YouTube Videos
If you want to make your videos smaller in size for some backup purposes, or if you want to upload it on YouTube or Facebook, do not get worry at all about this.
In this tutorial you may able to find the best software that easily compresses your videos to smaller sizes without even losing quality of your video, then let’s get started.
What factors impact on video file size?
There are many factors that impact the final video file size. Some of them are related to the quality of the video, such as the bitrate, the frame rate and many other factors like video codec related, which actually define what is the video file format (AVI / MP4 / FLV / MKV, etc.) and which codec is used to compress the video file (H.264, H.265, etc.).
Factors impact on the final video file sizes are – bitrate, frame rate and video codec
Each format is used for different use cases, but in the general use case, we recommend to use the MP4 format with H.264 codec.
This combination will provide the best mix between compression and video quality, so that you can end up with the best video quality, while keeping the video file size to the minimum required.
How to Compress a Video with Handbrake
The sample file we used to compress was called COSTA RICA.mp4 and its original size was 66.7 MB. After compression the file size was down to 4.40 MB.
Depending on your original video file, follow the instructions in the tutorial, but remember the file size may still be reduced if your video file is already MP4 format.
Step 1: Download Handbrake by choosing the version of your operating system from here. Double click the downloaded file to install Handbrake by following the instructions on screen.
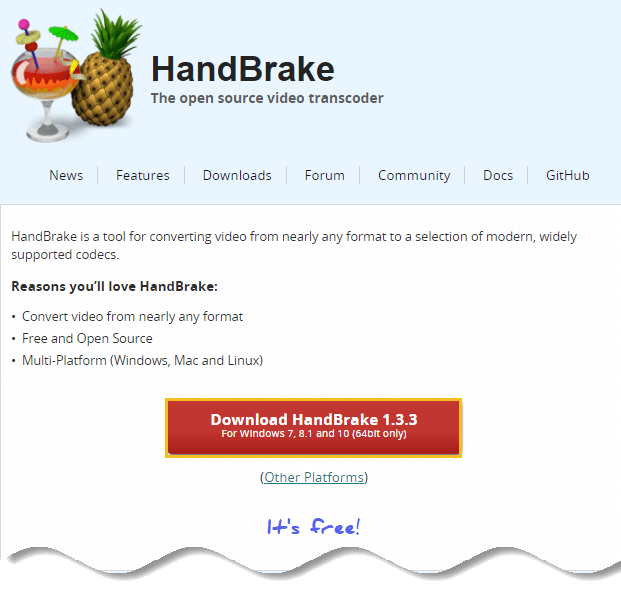
Step 2: Launch Handbrake. Drag and drop a video to the dashboard.

Step 3: In Handbrake, under Save As you can decide where the compressed file is saved by clicking Browse. By default, it is saved in the same folder where the original file is.

You can change to other location if necessary but you are required to provide a name for the compressed file.
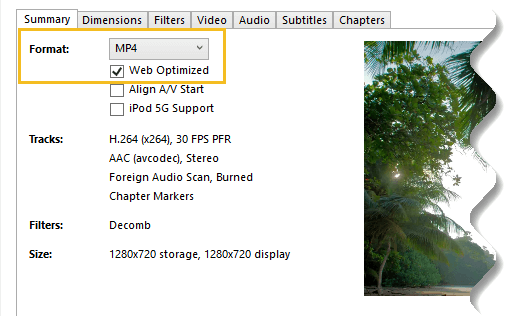
Step 4: For format, choose MP4 if it is not selected and select Web Optimized.
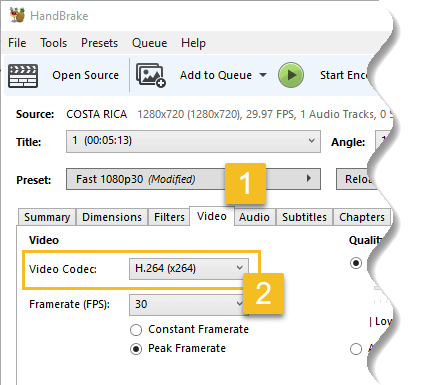
Step 5: Click on the video tab and make sure that H.264(X264) is selected for video codec.
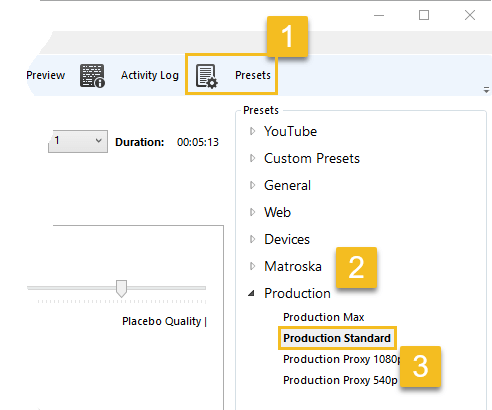
Step 6: Choose the Production Standard preset from the presets drawer (if this isn’t open).
Step 7: Choose the framerate depending on your source video. If it is PAL then leave it at 25fps. If it is NTSC then make it 29.97fps or 30fps.
Make sure you tick the Constant Framerate radio button to ensure better compatibility.
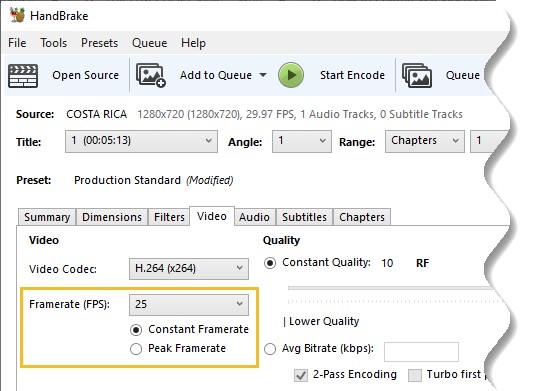
Step 8: Enter an Average Bitrate (kbps) for the video between 5,000-10,000 (choose 5000 unless you want a much higher quality video that will take longer to upload and download).
If you have plenty of time to wait while the program compresses your video, tick 2-pass encoding for better results. If you are in a hurry, then leave this box un-ticked.

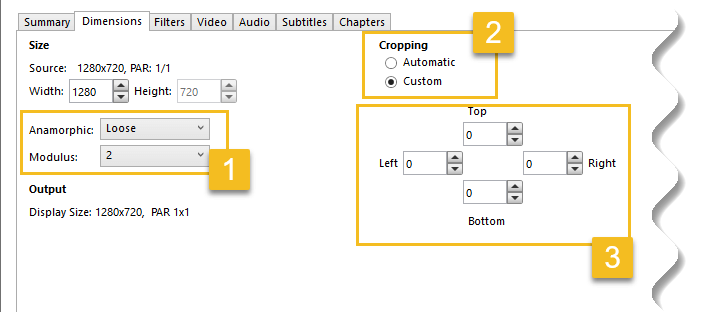
Step 9: Click on Dimensions tab, for Anamorphic select the option Loose and Modulus should be 2.
Check Cropping to Custom and make all values 0, if you don’t wish to crop your video, or check Automatic, whichever works for you.
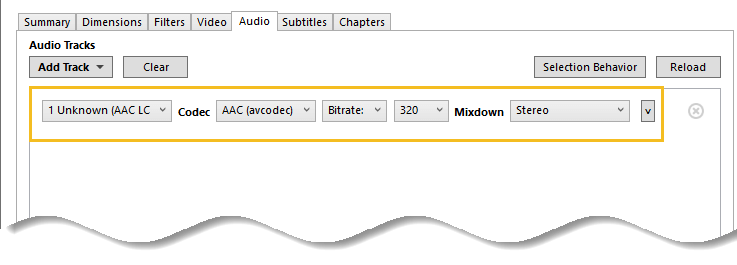
Step 10: On Audio tab, select AAC (avcodec) for codec. For Mixdown choose Stereo . Choose 320 for your audio Bitrate.
Step 11: Hit the Start Encode button and wait until video has finished encoding. Get some coffee while your CPU does all the heavy lifting and compresses your video files & converts it to mp4 format!

Handbrake will let you know when it has finished.
If you like the settings then you can save it as a preset by clicking the sign in the bottom right of the Presets drawer.

Conclusion
Video encoding can be an easy or a very time consuming process, depending on how deep you want to delve into the encoder’s settings.
For smaller files, the above parameters are all we need to compress a video. This tutorial aims to introduce the basic features in Handbrake.
Handbrake has many more features which allow you to change the level of compression. If you would like to learn more about videos and advanced features in Handbrake, then you must read it’s documentation.
How about you? Do you reduce the size of your videos before uploading them to YouTube or Facebook?
If you have any questions regarding Handbrake or if you want to share your secrets on video encoding, leave a comment below.


Add comment