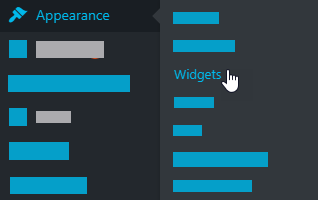
Step 5: This is our final step to display signup form on your WordPress site. The most common way of doing that is by adding it as a widget to either your sidebar or footer. To do that, just go to Appearance -> Widgets in your WordPress dashboard.

You will see a new widget there called “MailChimp Sign-Up Form”. Expand the option and select the location on your site where it would be displayed and you are done.

At this stage, your newsletter signup form has been added to a widget area and is fully operational. Everyone who visits your WordPress site will see it. Here is what our footer newsletter signup form looks like:

Conclusion
We hope this article helped you learn how to properly add a newsletter signup form to your WordPress site. But we are not yet finished. We have something special tip for you. Want to add your email newsletter signup form under specific blog post or page?
Then go to MC4WP -> Form on your WordPress dashboard and grab the shortcode that’s right beneath the form’s name.

You can now put that shortcode wherever you wish within your specific blog post or page. Like so:
JOIN OUR NEWSLETTER
This is our end of this article. But are you happy with how your signup form has turned out? Is there anything else we can help you with? Please, drop your comment if you are facing any issue while following this article.


Add comment