JavaScript is used in several ways in web pages such as generate warning messages, build image galleries, DOM manipulation, form validation, and more.
On our last post we have discussed about JavaScript history and what holds for it in the future. Now let’s take a look at some of the ways we can link JavaScript to HTML.
In short, there are 3 ways to include JavaScript in HTML:
- External JavaScript
- Internal JavaScript
- Inline JavaScript
Let’s see three of them step by step;
Calling an external JavaScript file
As you begin to work more extensively with JavaScript, you will be likely to find that there are cases where you are reusing identical JavaScript code on multiple pages of a site.
You are not restricted to be maintaining identical code in multiple HTML files. However, <script> tag provides a mechanism to allow you to store JavaScript in an external file and then include it into your HTML files.
This is useful if you want the same scripts available to multiple documents. It saves you from repeating the same task over and over again, and makes your website much easier to maintain.
Here is an example to show how you can include an external JavaScript file in your HTML code using <script> tag and its src attribute.
<!DOCTYPE html>
<html lang="en">
  <head>
    <meta charset="UTF-8" />
    <meta http-equiv="X-UA-Compatible" content="IE=edge" />
    <meta name="viewport" content="width=device-width, initial-scale=1.0" />
    <title>Calling an external JavaScript file</title>
  </head>
  <body>
    <script src="script.js"></script>
  </body>
</html>
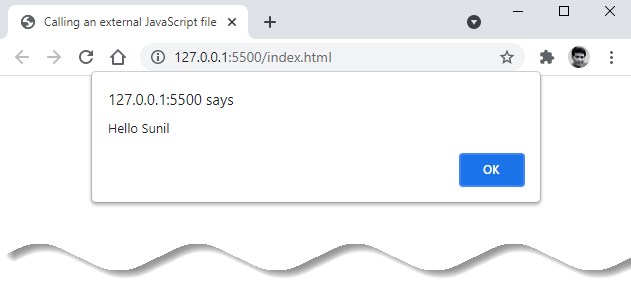
Well, let’s create a JavaScript file named script.js and place the following code in it:
alert('Hello Sunil');This as expected will show Hello Sunil on the page.

❗ Important
Usually when an external JavaScript file is downloaded for first time, it is stored in the browser’s cache (just like images and style sheets), so it won’t need to be downloaded multiple times from the web server that makes the web pages load more quickly.
You can also add multiple JavaScript files to your HTML file.
<script src="script.js"></script>
<script src="script_new.js"></script>
The way we have loaded our script above is an example of a normal loading.
There are three different ways to load an external JavaScript file:
- Normal loading
- Asynchronously loading
- Defer its loading
Normal loading
In this case the HTML file will be parsed until it encounters a reference to a JavaScript file, then the JavaScript file will be loaded and executed.
Once the execution finishes the browser will continue parsing the rest of the HTML file.
<script src="script.js"></script>
Asynchronously loading
When we load a JavaScript file asynchronously it will be downloaded alongside the HTML file. After the loading of the script is completed, the script will be executed and when the execution finishes the browser will continue parsing the HTML file.
When we want to load a script file asynchronously we just need to add the word async.
<script src="script.js" async></script>
Defer its loading
Deferring the loading of a JavaScript file means that the script execution will be delayed until the HTML document was loaded completely.
To defer the loading we just need to add defer to the reference.
<script src="script.js" defer></script>
Advantages of external JavaScript
Placing scripts in external files has multiple advantages:
- When JavaScript files are cached, pages load more quickly
- Separate files makes maintenance easier
- If you are using the same scripts in different HTML files, including an external file prevents repetitive code.
Internal JavaScript
Internal JavaScript is simply a block of JavaScript code within the HTML file itself. So we can embed the JavaScript code directly within our web pages by placing it between the <script> and </script> tags.
The <script> tag indicates the browser that the contained statements are to be interpreted as executable script and not HTML. Here's an example:
<!DOCTYPE html>
<html lang="en">
  <head>
    <meta charset="UTF-8" />
    <meta http-equiv="X-UA-Compatible" content="IE=edge" />
    <meta name="viewport" content="width=device-width, initial-scale=1.0" />
    <title>Internal JavaScript</title>
  </head>
  <body>
    <script>
      alert('Hello Sunil');
    </script>
  </body>
</html>
Now when we open this page we are going to see Hello Sunil.
The next million-dollar question is – Shall we put the <script> tags in the <head> or <body> section of the HTML?
Well, <script> tags can actually be put into both sections. But please take note that there is a difference where you put them and the order of the scripts does matter.
HTML and JavaScript are loaded in the order of “top to bottom, left-to-right”; Scripts that are closer to the top will be loaded first, scripts at the bottom of the page will be loaded last. This is very important, for a number of reasons:
- We place the critical scripts at the top.
- Place non-critical JavaScript at the bottom to speed up the loading.
Inline JavaScript
Generally, this method is used when we have to call a function in the HTML event attributes. There are many cases (or events) in which we have to add JavaScript code directly eg., onmouseover event, onclick, etc.
Let's see with the help of an example, how we can add JavaScript directly in the html without using the <script> tag.
<!DOCTYPE html>
<html lang="en">
  <head>
    <meta charset="UTF-8" />
    <meta http-equiv="X-UA-Compatible" content="IE=edge" />
    <meta name="viewport" content="width=device-width, initial-scale=1.0" />
    <title>Inline JavaScript</title>
  </head>
  <body>
    <a href="#" onclick="alert('Hello Sunil!');">Click Me</a>
  </body>
</html>
Inline JavaScript is also placed either in the <head> or <body> tags.
Conclusion
In this article, we talked about the three different ways to add JavaScript in HTML code and once you get a hang of things, the possibilities are endless. JavaScript can be used in combination with HTML to power modern web applications that are intuitive, interactive and user-friendly.


Add comment