
Windows 10 is pretty robust when it comes to recovering from problems that might stop it from working properly, but there may come a time when it needs some manual intervention. The system restore feature has been a part of Windows for decades.
In Windows 10 it’s still useful for recovering quickly when a new app or device driver causes instability. The causes as to why your operating system might break are numerous.
Also Read: How to Take a Screenshot on Windows 10
Most likely, a third party application you install or a virus you got while surfing the internet might cause registry file error of your Windows 10 operating system.
By having a system restore point, you will be able to rescue your system to an earlier point in time thus fixing major OS issues very quickly.
System restore works by creating snapshots called “restore points”, which keep backup copies of your system configuration, including registry settings, driver files, and third-party programs.
By default, system restore is disabled on Windows 10, but when enabled and configured correctly, it can automatically create restore points, but you can create restore points manually before making any system changes.
In this Windows 10 guide, we will walk you through the steps to configure and use system restore to undo changes that may be harming your device.
How to enable system restore in Windows 10
Use the following steps to turned on system restore on Windows 10:
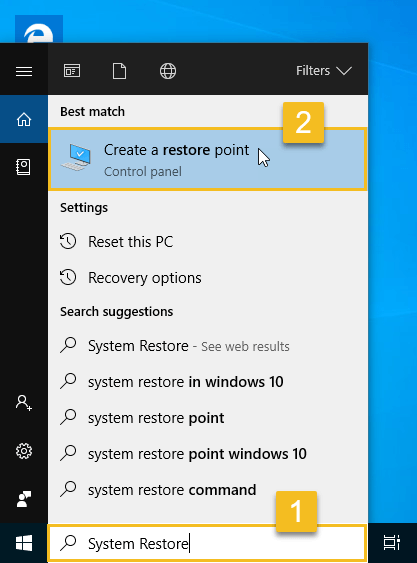
Step 1: Click on Start .
Step 2: Search for “System Restore,” and click the result of Create a restore point.
Step 3: Under the System protection setting, select the main system drive (Local disk -C in our case) and click the Configure button.

Step 4: Select the Turn on system protection option and then use the Max Usage slider to determine how much of your hard drive to use to store restore points — 5% to 10% is usually sufficient.

Step 5: Click Apply.
Step 6: Click OK.
How to create a restore point in Windows 10
Windows saves some restore points automatically during a significant change like installing a new app or a downloaded driver or low-level system utility. But there will be times where you may want to manually create a restore point before modifying anything that might cause problems if you do not do it correctly.
💡Note
Every once in a while, before you install a piece of software or make some new setting in Windows, if things seem to be running just fine create a system restore point.
It’s good computer practice, just like backing up your files, only you are backing up your settings. Once a month or once every couple of months works for most people, but if you frequently make changes, create a system restore point more often.
Use the following steps to create a system restore point on Windows 10:
Step 1: Click on Start .
Step 2: Search for “System Restore,” and click the result of Create a restore point.
Step 3: Under the System protection, select the main system drive, and click the Create button.

Step 4: Enter a description to identify the restore point.

Step 5: Click Create.


Add comment