
Embarking on your React journey involves more than just mastering components and states; it’s about bringing your applications to life with engaging visuals.
In this beginner’s guide, we’ll demystify the process of adding and displaying images in React.
So let’s unravel the art of image integration in React and take your projects to the next level.
Method 1 : Add Network Images to React
The most straightforward approach involves treating your React application like any other web application.
Simply pass the URL string to the ‘src‘ property of the HTML image tag.
Let’s navigate this process using the provided URL as our reference.
URL: https://i.ibb.co/z5PsZnD/bicycle-bike-sticker.jpg
ReactImg.jsx
import React from 'react'

const ReactImg = () => {
	return (
		<div>
			<img src='https://i.ibb.co/z5PsZnD/bicycle-bike-sticker.jpg' style={{width:'300px'}}/>
		</div>
	)
}

export default ReactImg
App.jsx
import ReactImg from './Components/ReactImg';
function App() {
return (
<>
<ReactImg/>
</>
);
}
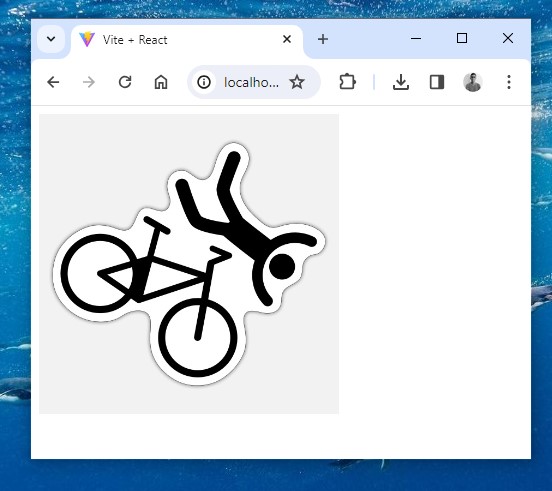
export default App;This should render the following to the user.
Output:
Method 2 : Use the Import Keyword in React to Load Images
Adding images to your React project is easy – just import them like regular components. Importing an image this way generates a string value, which can later be used in your JSX.
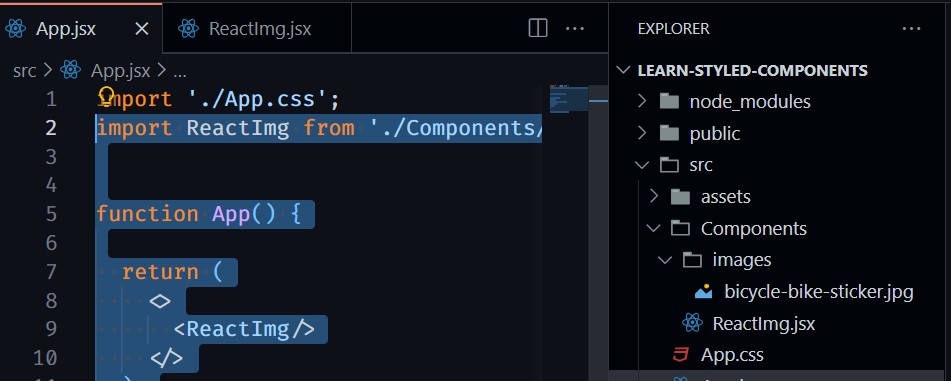
Place your images in the ‘Components’ directory, neatly organized in an ‘images’ subfolder.
Let’s set up this structure using a sample image, say ‘bicycle-bike-sticker.jpg’.
We can then import it into our application and use it as follows:
ReactImg.jsx
import React from 'react'
import BicycleSticker  from './images/bicycle-bike-sticker.jpg'

const ReactImg = () => {
	return (
		<div>
			<img src={BicycleSticker} style={{width:'300px'}}/>
		</div>
	)
}

export default ReactImg
App.jsx
import ReactImg from './Components/ReactImg';


function App() {

  return (
    <>
      <ReactImg/>
    </>
  );
}

export default App;
Which should then render the below image.
Output:
It’s important to note that for accessibility considerations, always include the ‘alt‘ property in the HTML image tag. This text serves as a fallback in case the image fails to load, catering to users who depend on screen readers to interpret content.
Method 3 : Add SVG Files to React
The SVG format stores images as vectors which are graphics made up of points, lines, and curves based on geometry and mathematical formulas.
Because they are based on numbers and values rather than a grid of pixels like raster images(.png and.jpg), they do not lose quality when zoomed or resized.
Let’s go through some of the most used methods when importing SVGs into React Apps.
How to Import SVGs Using the Image Tag
Importing SVGs using the image tag is one of the easiest ways to use an SVG. Here is an example:
ReactImg.jsx
import React from 'react'
import BeachUmbrella  from './images/BeachUmbrella.svg'


const ReactImg = () => {
	return (
		<div>
			<img src={BeachUmbrella} style={{width:'300px'}}/>
		</div>
	)
}

export default ReactImg
App.jsx
import ReactImg from './Components/ReactImg';


function App() {

  return (
    <>
      <ReactImg/>
    </>
  );
}

export default App;
Which should then render the below image.
Output:

While this approach is straightforward, it does have one disadvantage: unlike the other methods for importing, you cannot style the SVG imported in a img element.
As a result, it will be suitable for an SVG that does not need customization, like logos.
How to Import SVGs by Adding them Directly as JSX
JSX supports the svg tag, so we can copy-paste the SVG directly into our React components.
The approach is possible because SVGs are in XML format, just like HTML. So, we can convert it to JSX syntax.
Here is an example:
ReactImg.jsx
import React from 'react';

const ReactImg = () => {
  return (
    <div>
      <svg
        xmlns="http://www.w3.org/2000/svg"
        className="ionicon"
        viewBox="0 0 512 512"
      >
        <path
          d="M160 136c0-30.62 4.51-61.61 16-88C99.57 81.27 48 159.32 48 248c0 119.29 96.71 216 216 216 88.68 0 166.73-51.57 200-128-26.39 11.49-57.38 16-88 16-119.29 0-216-96.71-216-216z"
          fill="none"
          stroke="currentColor"
          strokeLinecap="round"
          strokeLinejoin="round"
          strokeWidth={32}
        />
      </svg>
    </div>
  );
};

export default ReactImg;
App.jsx
import ReactImg from './Components/ReactImg';


function App() {

  return (
    <>
      <ReactImg/>
    </>
  );
}

export default App;
Including SVGs inline offers the advantage of accessing various properties, enabling flexible styling and customization.
However, it’s important to note that if your SVG file is large, it may lead to complex code, potentially impacting readability and productivity. In such cases, consider using a PNG or JPEG file instead.
How to Import SVGs as React Components
vite-plugin-svgr is a plugin for Vite that uses svgr under the hood to transform SVGs into React components.
You can install it by running the following command:
npm i vite-plugin-svgrNext, add the plugin inside your app’s vite.config.js:
import { defineConfig } from 'vite'
import react from '@vitejs/plugin-react'
import svgr from 'vite-plugin-svgr'

// https://vitejs.dev/config/
export default defineConfig({
  plugins: [
		react(),
		svgr({
      svgrOptions: {
        // svgr options
      },
    }),
	],
})
Now, you can import the SVG files as React components:
ReactImg.jsx
import React from 'react';
import BeachUmbrella  from './images/beachumbrella.svg?react';
const ReactImg = () => {
  return (
    <div>
      <BeachUmbrella/>
    </div>
  );
};

export default ReactImg;
App.jsx
import ReactImg from './Components/ReactImg';


function App() {

  return (
    <>
      <ReactImg/>
    </>
  );
}

export default App;
Method 4 : Display An image From The Public Directory in React
You can also render images that are located in the public directory of your React project.
When your images are located in the public directory, use an absolute path.
The following example assumes that there is a BicycleSticker.jpg image located under public/BicycleSticker.jpg.
ReactImg.jsx
import React from 'react';

const ReactImg = () => {
  return (
    <div>
			<img src='/BicycleSticker.jpg'/>
    </div>
  );
};

export default ReactImg;
Notice that we specified an absolute path to the image – one that starts with a forward slash.
App.jsx
import ReactImg from './Components/ReactImg';


function App() {

  return (
    <>
      <ReactImg/>
    </>
  );
}

export default App;
Conclusion
As we conclude our exploration of diverse methods for integrating images into React applications, it becomes evident that flexibility and choice are at the forefront of this process.
Further Reading
- Unable to import SVG with Vite as ReactComponent
- Vite plugin to transform SVGs into React components
- Import SVGs in a React and Vite app
- Uncaught ReferenceError: process is not defined


Add comment