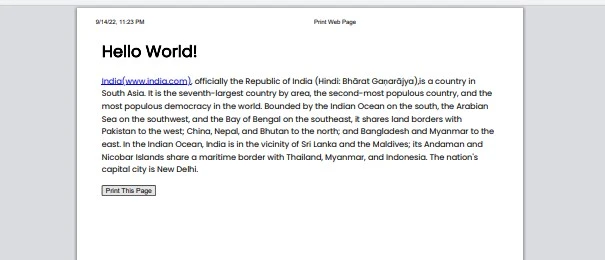
CSS give you considerable control over how content on your web pages is displayed on the screen. This control extends to other media as well, such as when the web page is printed.
It’s worth considering why you would want to create a print link in HTML after all, most users already know how to print a web page using their browser’s menus or can quickly figure it out.
But there are situations where adding a print button will not only make the process easier for your users when they need to print out a page but, perhaps even more importantly, give you more control over how those printouts will appear on paper.
In this quick tutorial we are going to learn how to add a print button and also how to define which pieces of your page content will be printed and which will not.
How to Print the entire page (Adding a Print Button)
If you wish to include a print button on your web page, you can simply do it by pasting the following code into the HTML text where the button should appear:
<button onclick="window.print();return false;">Print This Page</button>
See the Pen How to Print the entire page (Adding a Print Button) by Sunil Pradhan (@Sunil_Pradhan) on CodePen.
When the viewer clicks the link it will activate the printer dialog box so the viewer can print the webpage. However it will print the entire webpage, navigation bar, ads and all.
Wouldn’t it be nice if you can control which part of the webpage will print? Humm….then here’s how
How to make specific sections printable
It is possible to enable visitors to print particular sections of your web page by define a separate CSS styles using media queries for web pages that translate to a Letter or A4 document.
Websites that sells tickets do this often (think: boarding passes, entrance tickets, proof of purchase, invoices, et cetera).
CSS Media Queries for Print
First of all, we define the media query:
@media print {
  /* styles goes here */
}
Assuming that this appears at the bottom of your CSS stylesheet, most styles within the media query for print should overwrite anything else that exists with ease.
If not, try using the !important rule.
When downloading webpages as PDF, users don’t need:
- UI elements
- Header/footer
- Sidebar content
- Forms and CTAs
- Et cetera
We need to hide those elements using display:none;.
Our code then becomes (as an example):
@media print {
    header, footer, aside, form, … {
        display: none;
    }
}
Browsers are actually quite efficient when it comes to redefining page margins and stacking content. That being said, you might want to define your own margins, which is reasonably easy to do. Just remember to use cm instead of px!
Our code then becomes:
@media print {
  header, footer, aside, form, … {
    display: none;
  }

@page {
  margin: 2cm;
}
As you can see from the code example above, margins are defined using the @page at-rule, not by adding margins to the <body> element, since the <body> only exists once and spans the height of all the pages collectively.
With this declarative we can even define separate margins for first, last, left and right pages for example:
@page:first {
    margin: 0cm;
}
@page:last {
    margin: 5cm;
}
@page:left {
    margin: 2cm 1.5cm 2cm 2cm;
}
@page:right {
    margin: 2cm 2cm 2cm 1.5cm;
}
Links are still clickable in PDFs, but for those users that might want to physically hold the content, we’ll need to come up with something more creative.
@media print {
  a:after {
    content: "("attr(href)")";
  }
}
What this does, is takes the value of the href attribute and displays it in brackets after the link, like this:

That’s it, when folks click the “Print this page” button only the stuff within that tag will print, stuff outside of that tag won’t. Cool, wouldn’t you agree? Yeah we thought you would.
To make things easier, or if you have “special requirements” to print stuff like a PDF document on the server – Check out print.js.
Conclusion
Thank you for reading, and we have come to the end of this guide. We hope that it has helped you with your project, and if you want to share anything with this guide, please feel free to comment below.
Good luck and happy coding!
Further Reading
- Hide page URL when printing in chrome
- Create print styles using CSS3 @media queries
- How can I insert a Print button that prints a form in a webpage


Add comment